
Interactive Demo
Interactive Demonstration of Snap Integration
Step 1 and Step 2 in Snap Integration Overview are explained here using interactive demonstration. You can also observe the source code and see the real-time output by trying the Snap integration demo below.
Requirements
Midtrans Account and API keys will be used in this integration, but we will be using a predefined demo keys.
Specifications
- Backend: This demo is using NodeJS (hosted on CodeSandbox) for simplicity, but you can use any backend language.
- Frontend: HTML and JavaScript.
Usage Explanation
You will observe the basic implementation flow of creating payment page via Snap API.
- Click Proceed to Payment to test the frontend.
NotePlease wait until the window/iframe below is fully loaded. It may take some time while it tries to build the backend.
CodeSandbox demo Midtrans NodeJS
- Click Open Sandbox to view and edit the full source code. You can modify with the sample code or copy it as a reference to your local machine.
Alternative Frontend Integration Sample
A sample frontend integration, hosted on JSFiddle is shown below.
- Enter the value of
snap_transaction_tokenin Snap Token field. - Click Pay.
- Click HTML to see the source code.
Testing Payment
You can perform successful transaction by entering the card credentials given below.
| Name | Value |
|---|---|
| Card Number | 4811 1111 1111 1114 |
| CVV | 123 |
| Exp Month | Any month in MM format. For example, 02. |
| Exp Year | Any future year, in YYYY format. For example, 2025. |
| OTP/3DS | 112233 |
For more test payment credentials, refer to Testing Payments on Sandbox.
Testing in Midtrans Demo Store
You can also simulate how the transaction flow would look like in Snap Checkout via Midtrans Demo Store (Pop Up & Redirection, Embedded).
Configuring the payment flow
By default, Demo Store will show all payment methods with one time payment flow if not configured. To explore other flows, after clicking 'Buy Now', configure what you want to customize in this step.
-
Configuring cart and customer details
You can modify the quantity and customer details by configuring it here. If you want to receive payment receipt emails as well make sure you change the email provided here to your email.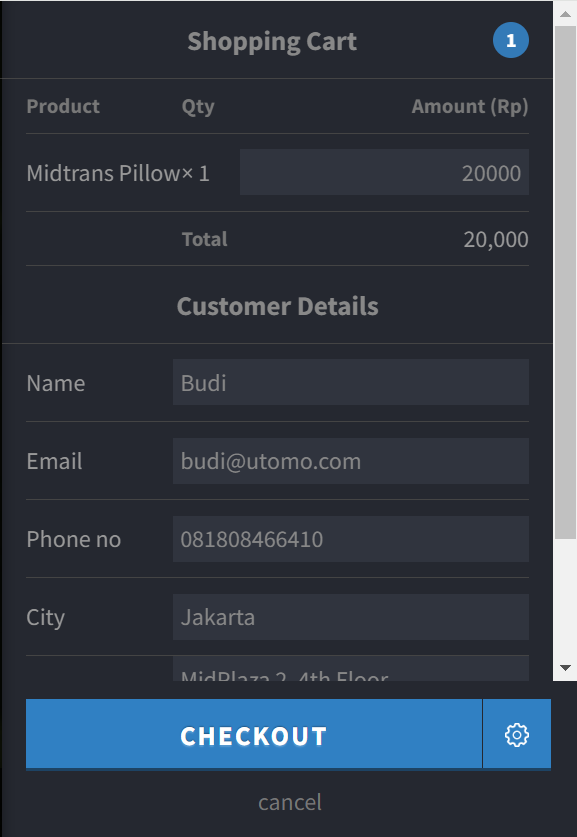
-
To configure the payment methods, click the gear icon next to the
Checkoutbutton. -
To proceed with standard setup, select the first option. Otherwise, click the
Set advanced ruleoption.- UI Method : choose between Pop Up mode (Snap Checkout window will be overlaid in the webpage) or Redirection mode (you will be redirected to a dedicated Snap Checkout page)
- Active Payment Channels : select Custom Select to manually choose what payment method to be shown in the payment list page. If you only choose 1 payment method, Snap Checkout will skip showing the payment list and jump directly to that specific payment method flow. Depending what payment method you choose here, other payment method settings may or may not show below.
- GoPay Tokenization Settings : will only appear if you choose GoPay in the previous step. Modify this if you want to simulate GoPay Tokenization payment flow. You can type in any values here as the user ID, as long as it hasn't been used before Snap Checkout will show you the linking flow when you first see the Snap Checkout page in Demo Store.
- Credit Card Settings : will only appear if you choose Card in the previous step. If you want to simulate the card recurring payment flow, make sure to choose the
1-Clickoption in theRecurring Usermenu. You can also modify the 3DS Settings, Authorize flow, and Installment flow here. Leave everything else as default unless you have a specific scenario to simulate. - ATM/Bank Transfer Settings : will only appear if you choose Bank Transfer in the previous step. You can optionally modify the custom VA number and expiry time here.
- Merchant Settings : skip this step as this is a legacy feature.
Finally, click Start to invoke Demo Store's Snap Checkout page.
Next Step
Get Your Own API Keys
Sign up for Midtrans account and retrieve your API keys. Follow the steps here.
Handling After-Payment Scenarios
Follow this guide after you have finished your integration to handle completed payments and implement advanced features.
Updated 5 months ago