
This guide covers the initial steps required to access the portal, create your MiniApp project, and prepare your local setup.
1. Onboard to GoPay Mini App Portal
Please follow the steps below to gain access:
- Complete the GoPay Mini App Portal Submission to request login access.
Kindly check your email after 1-2 days. - Log in Gopay Mini App Portal and fill out required details and submit.
Kindly check the portal again 1-2 days after approval from GoPay.
You may contact support team if needed.
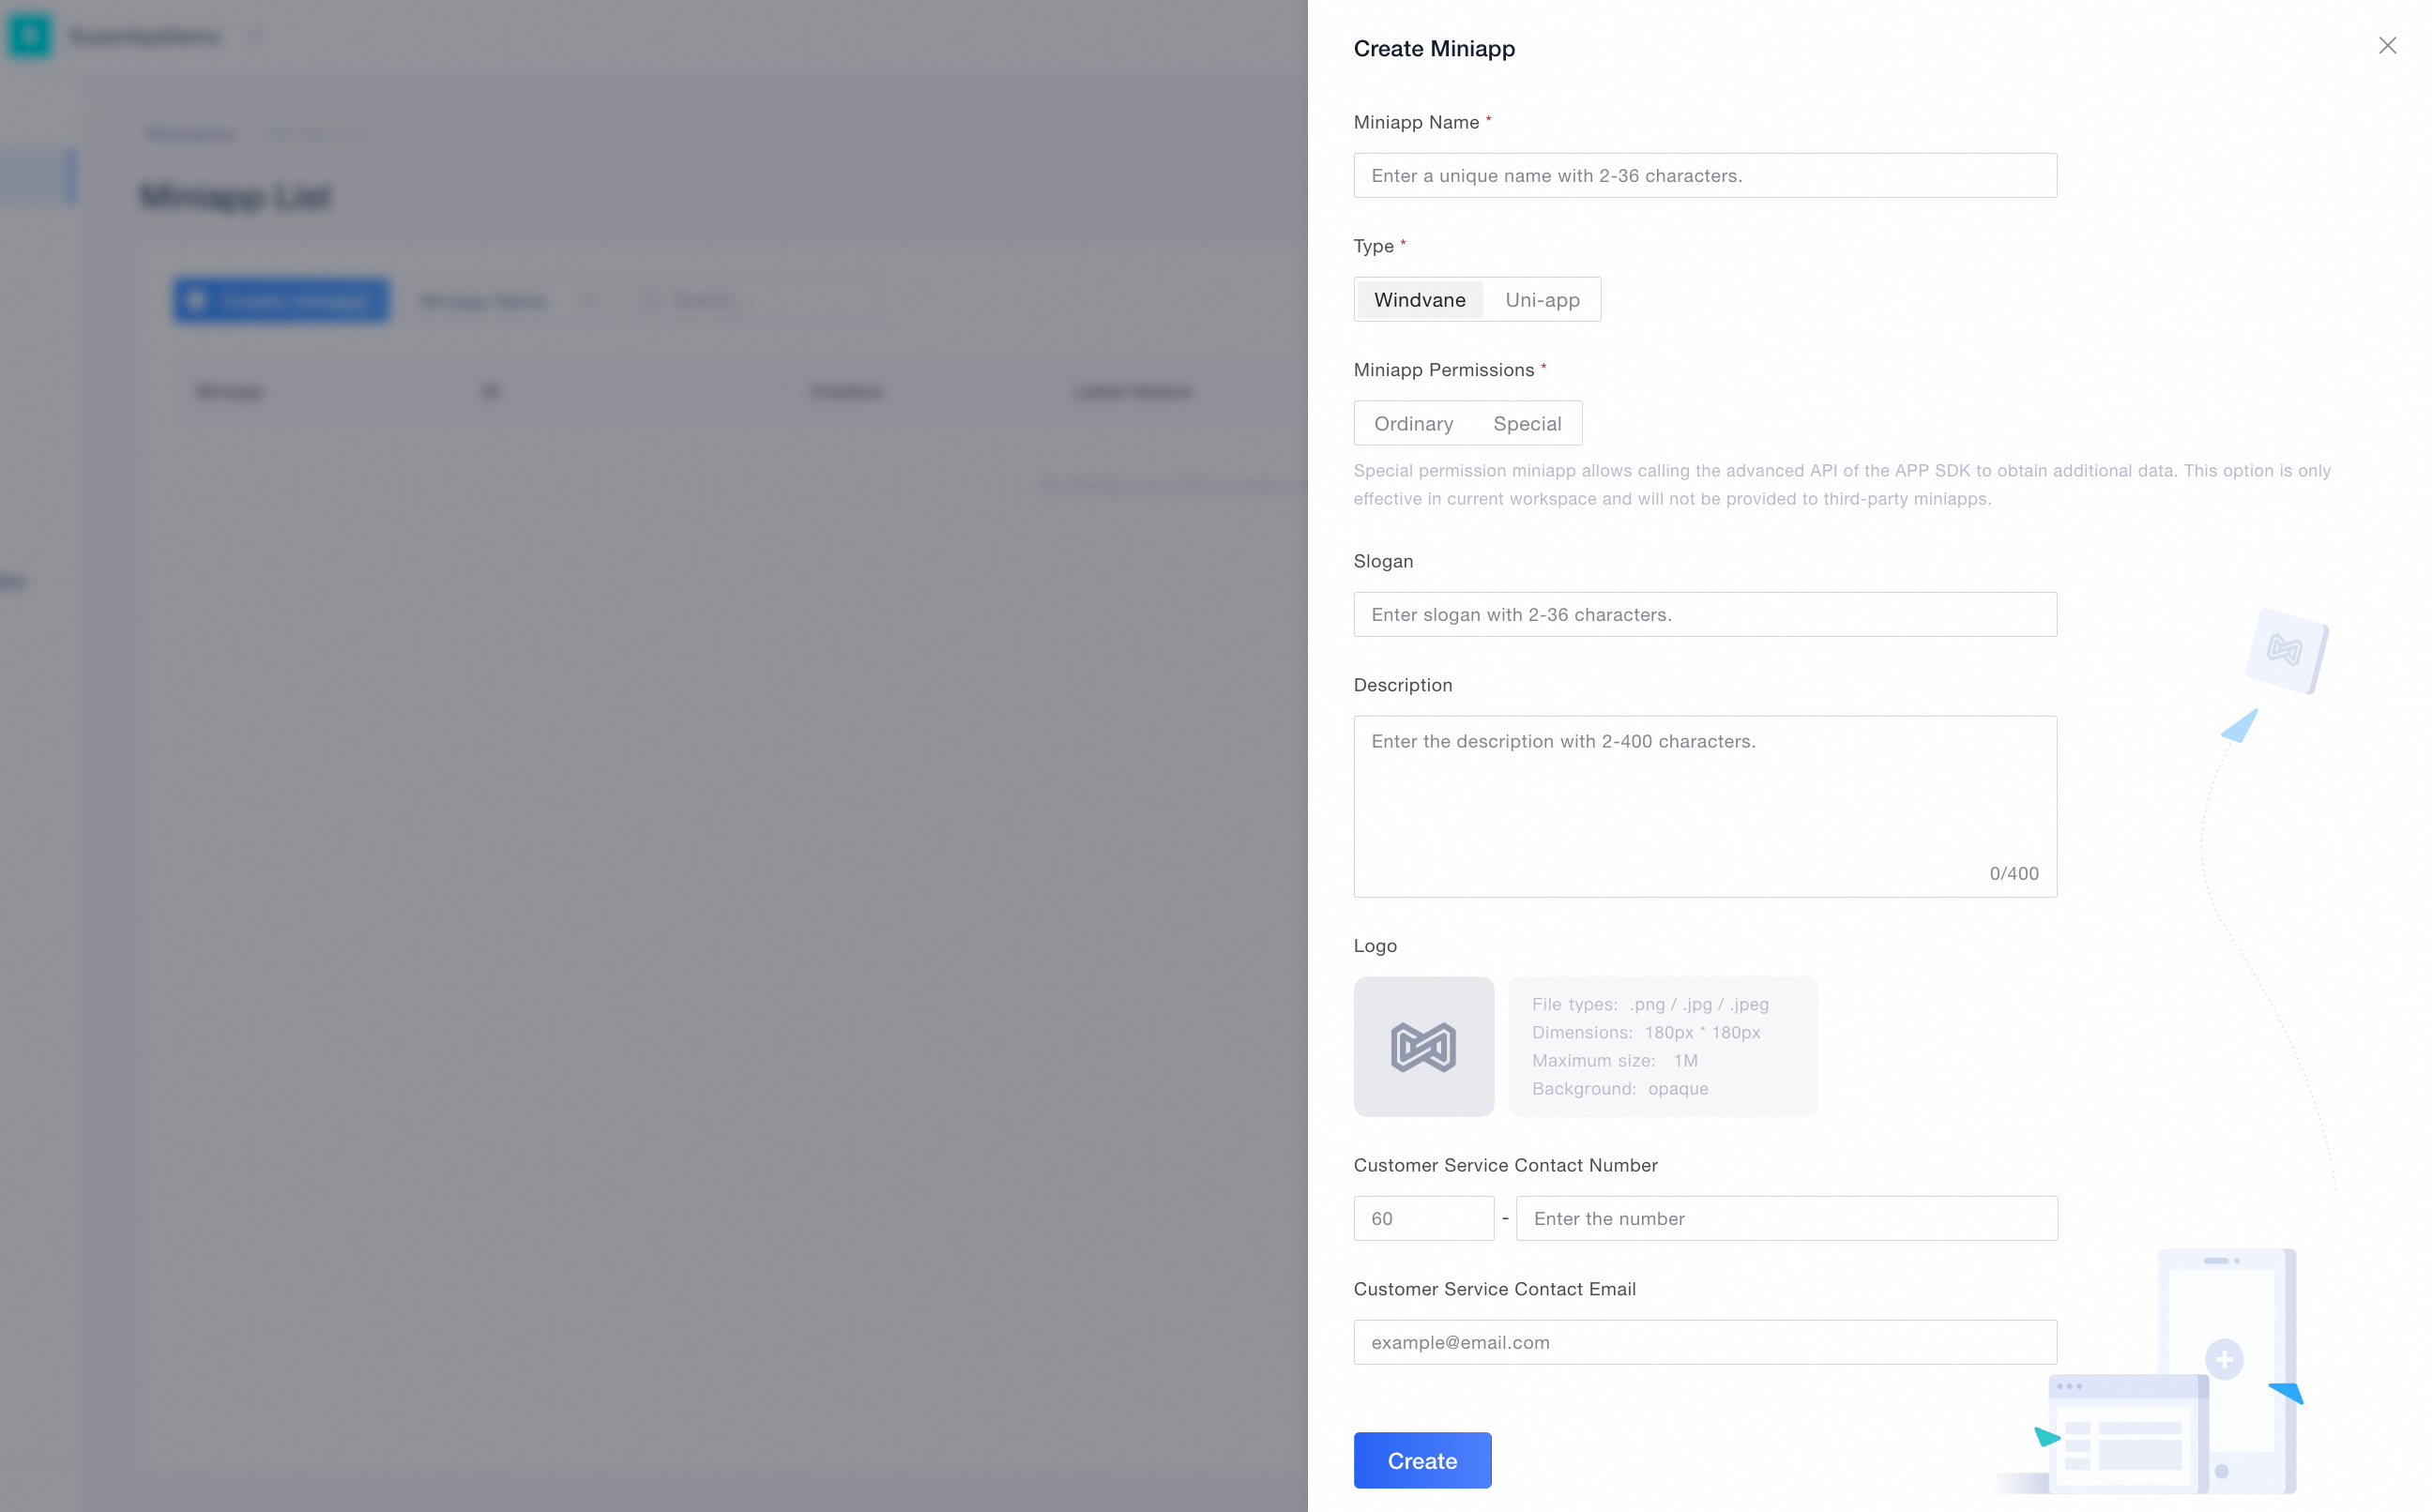
2. Create New MiniApp Project
-
Log in to the Gopay Mini App Portal.
-
Create a Miniapp
-
If you don’t have one yet, go to the MiniApp page and click “Create Miniapp.”

-
Fill in the required info: name, type (only windvane), permissions, description, logo, contact info, etc. Click “Create” to finish
-
-
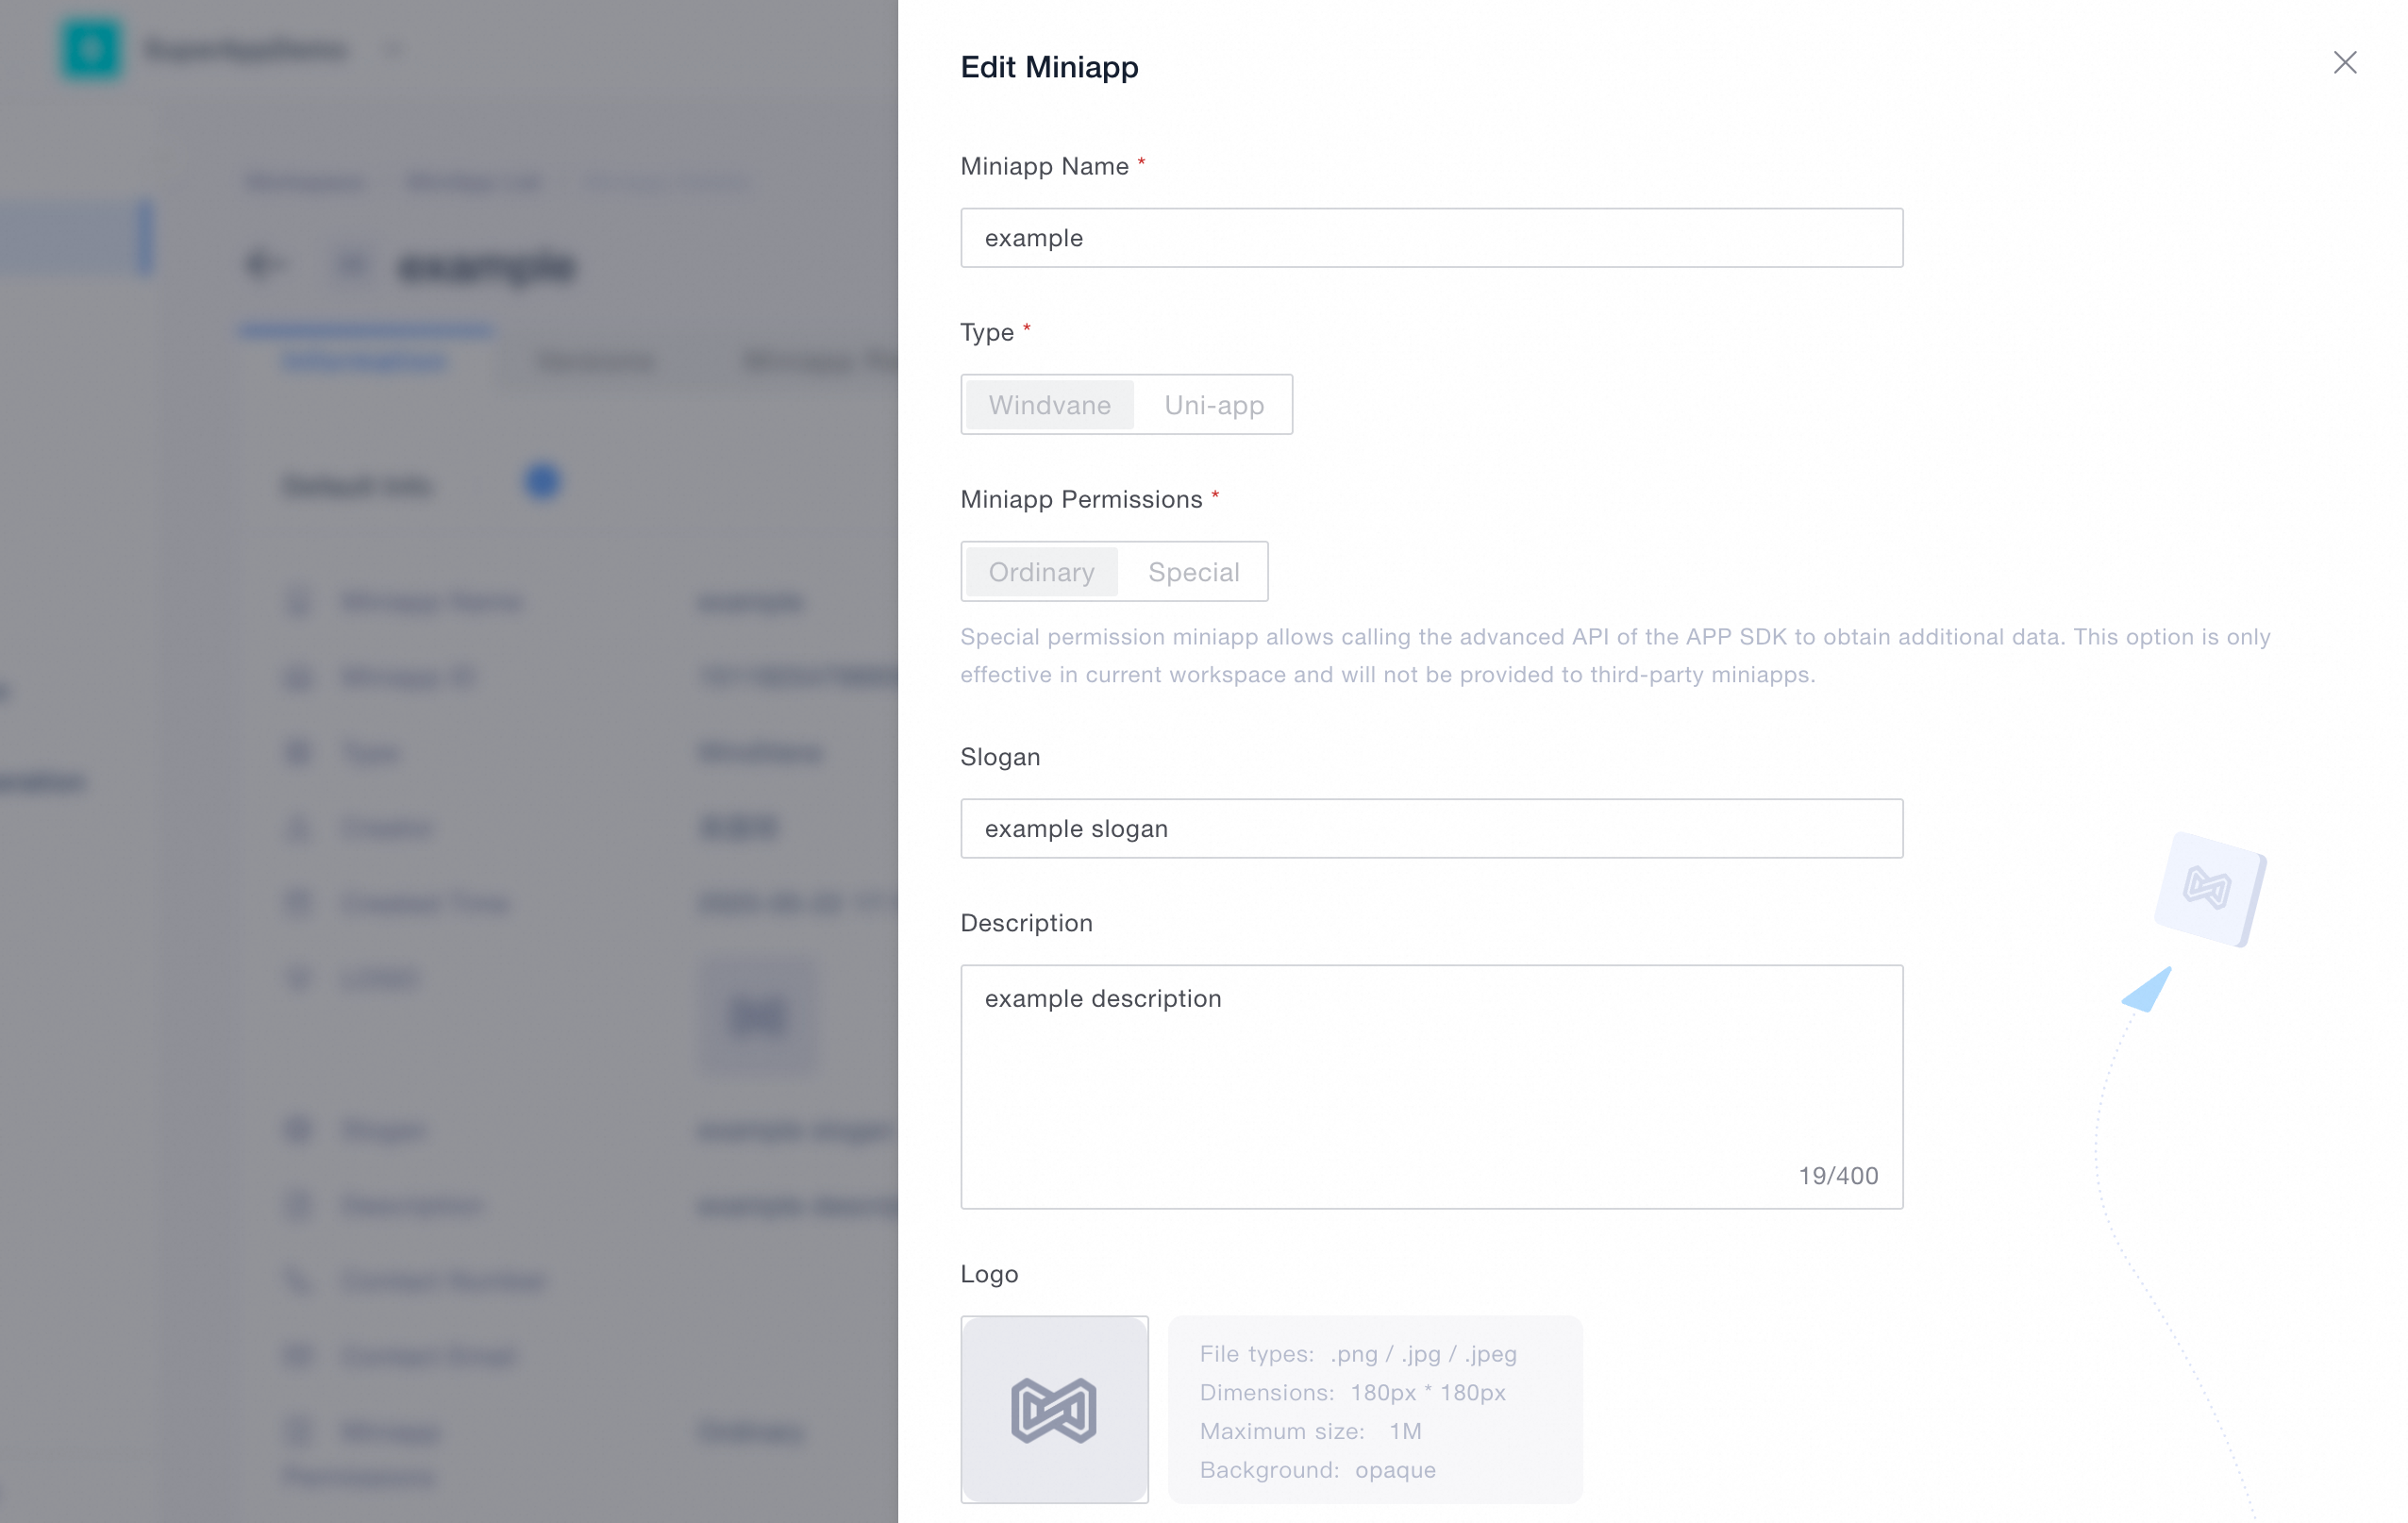
If a MiniApp already exists, you can skip creation and proceed to edit or publish it.
-
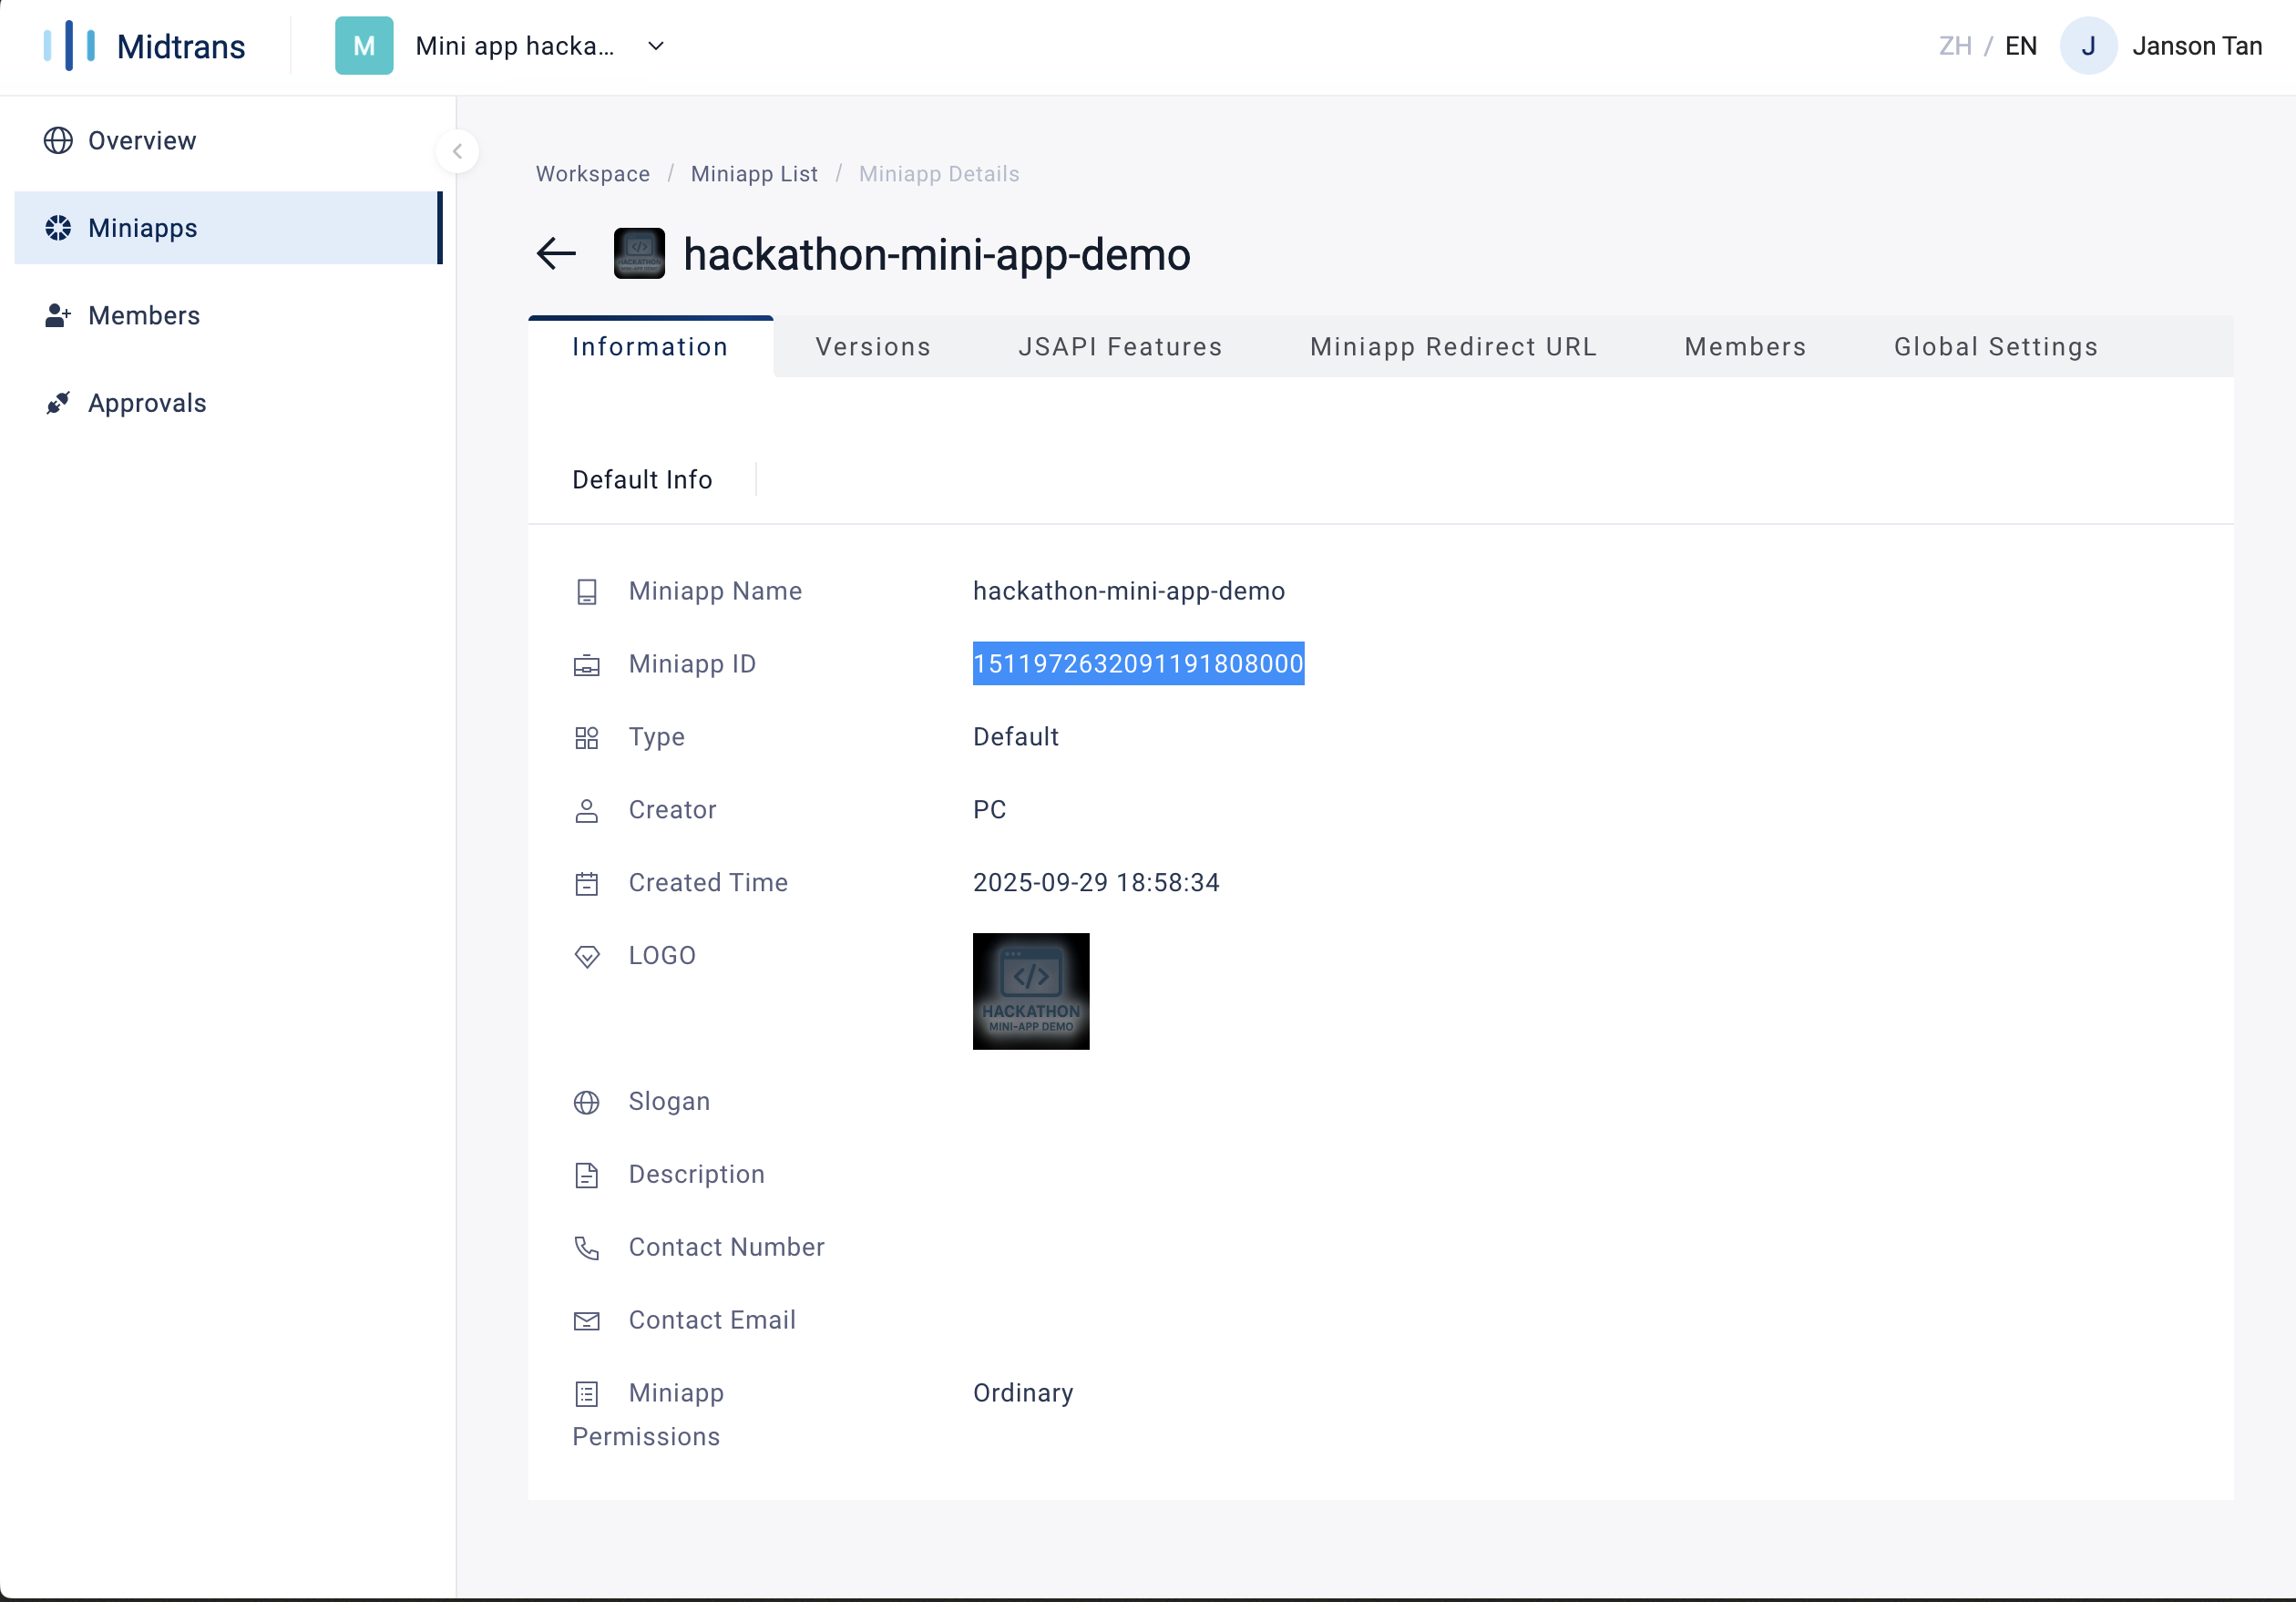
Took note of the Miniapp ID
-
Continue to submit form and select "Create new MiniApp" and input Miniapp ID as mentioned in quick start section
3. Project Initial Setup
Install the Visual Studio Code Extension
-
Install the GoPay Mini App Plugin in VS Code
-
Download Gopay VS Code Extension from here
-
Open VS Code.
-
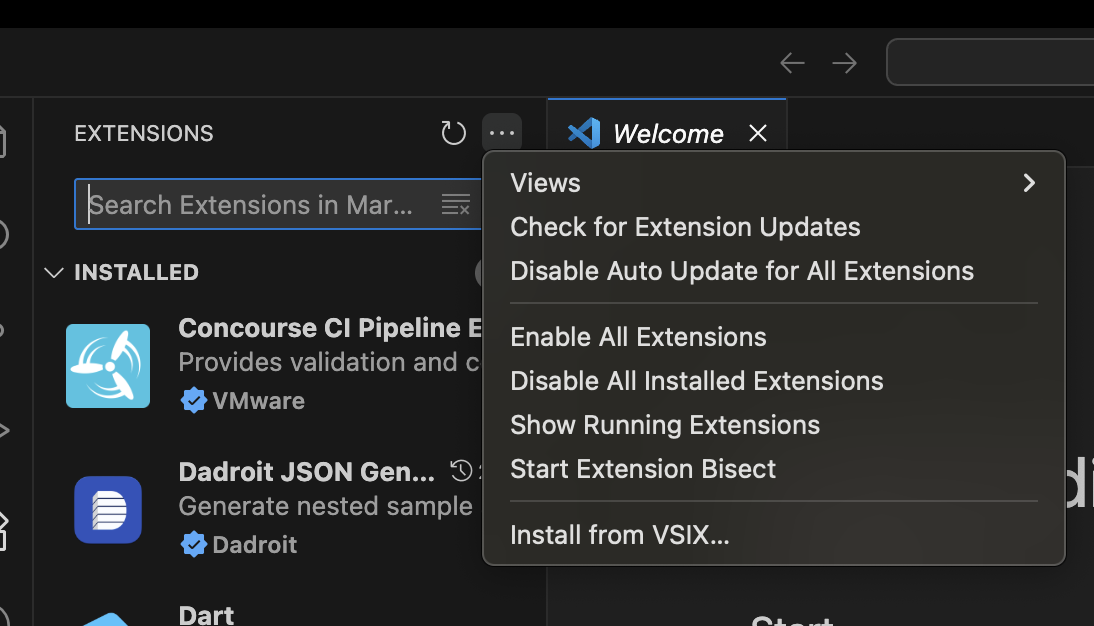
Click the Extensions icon in the sidebar and click (...) symbol.
-
Install from ViX using the downloaded build.
-
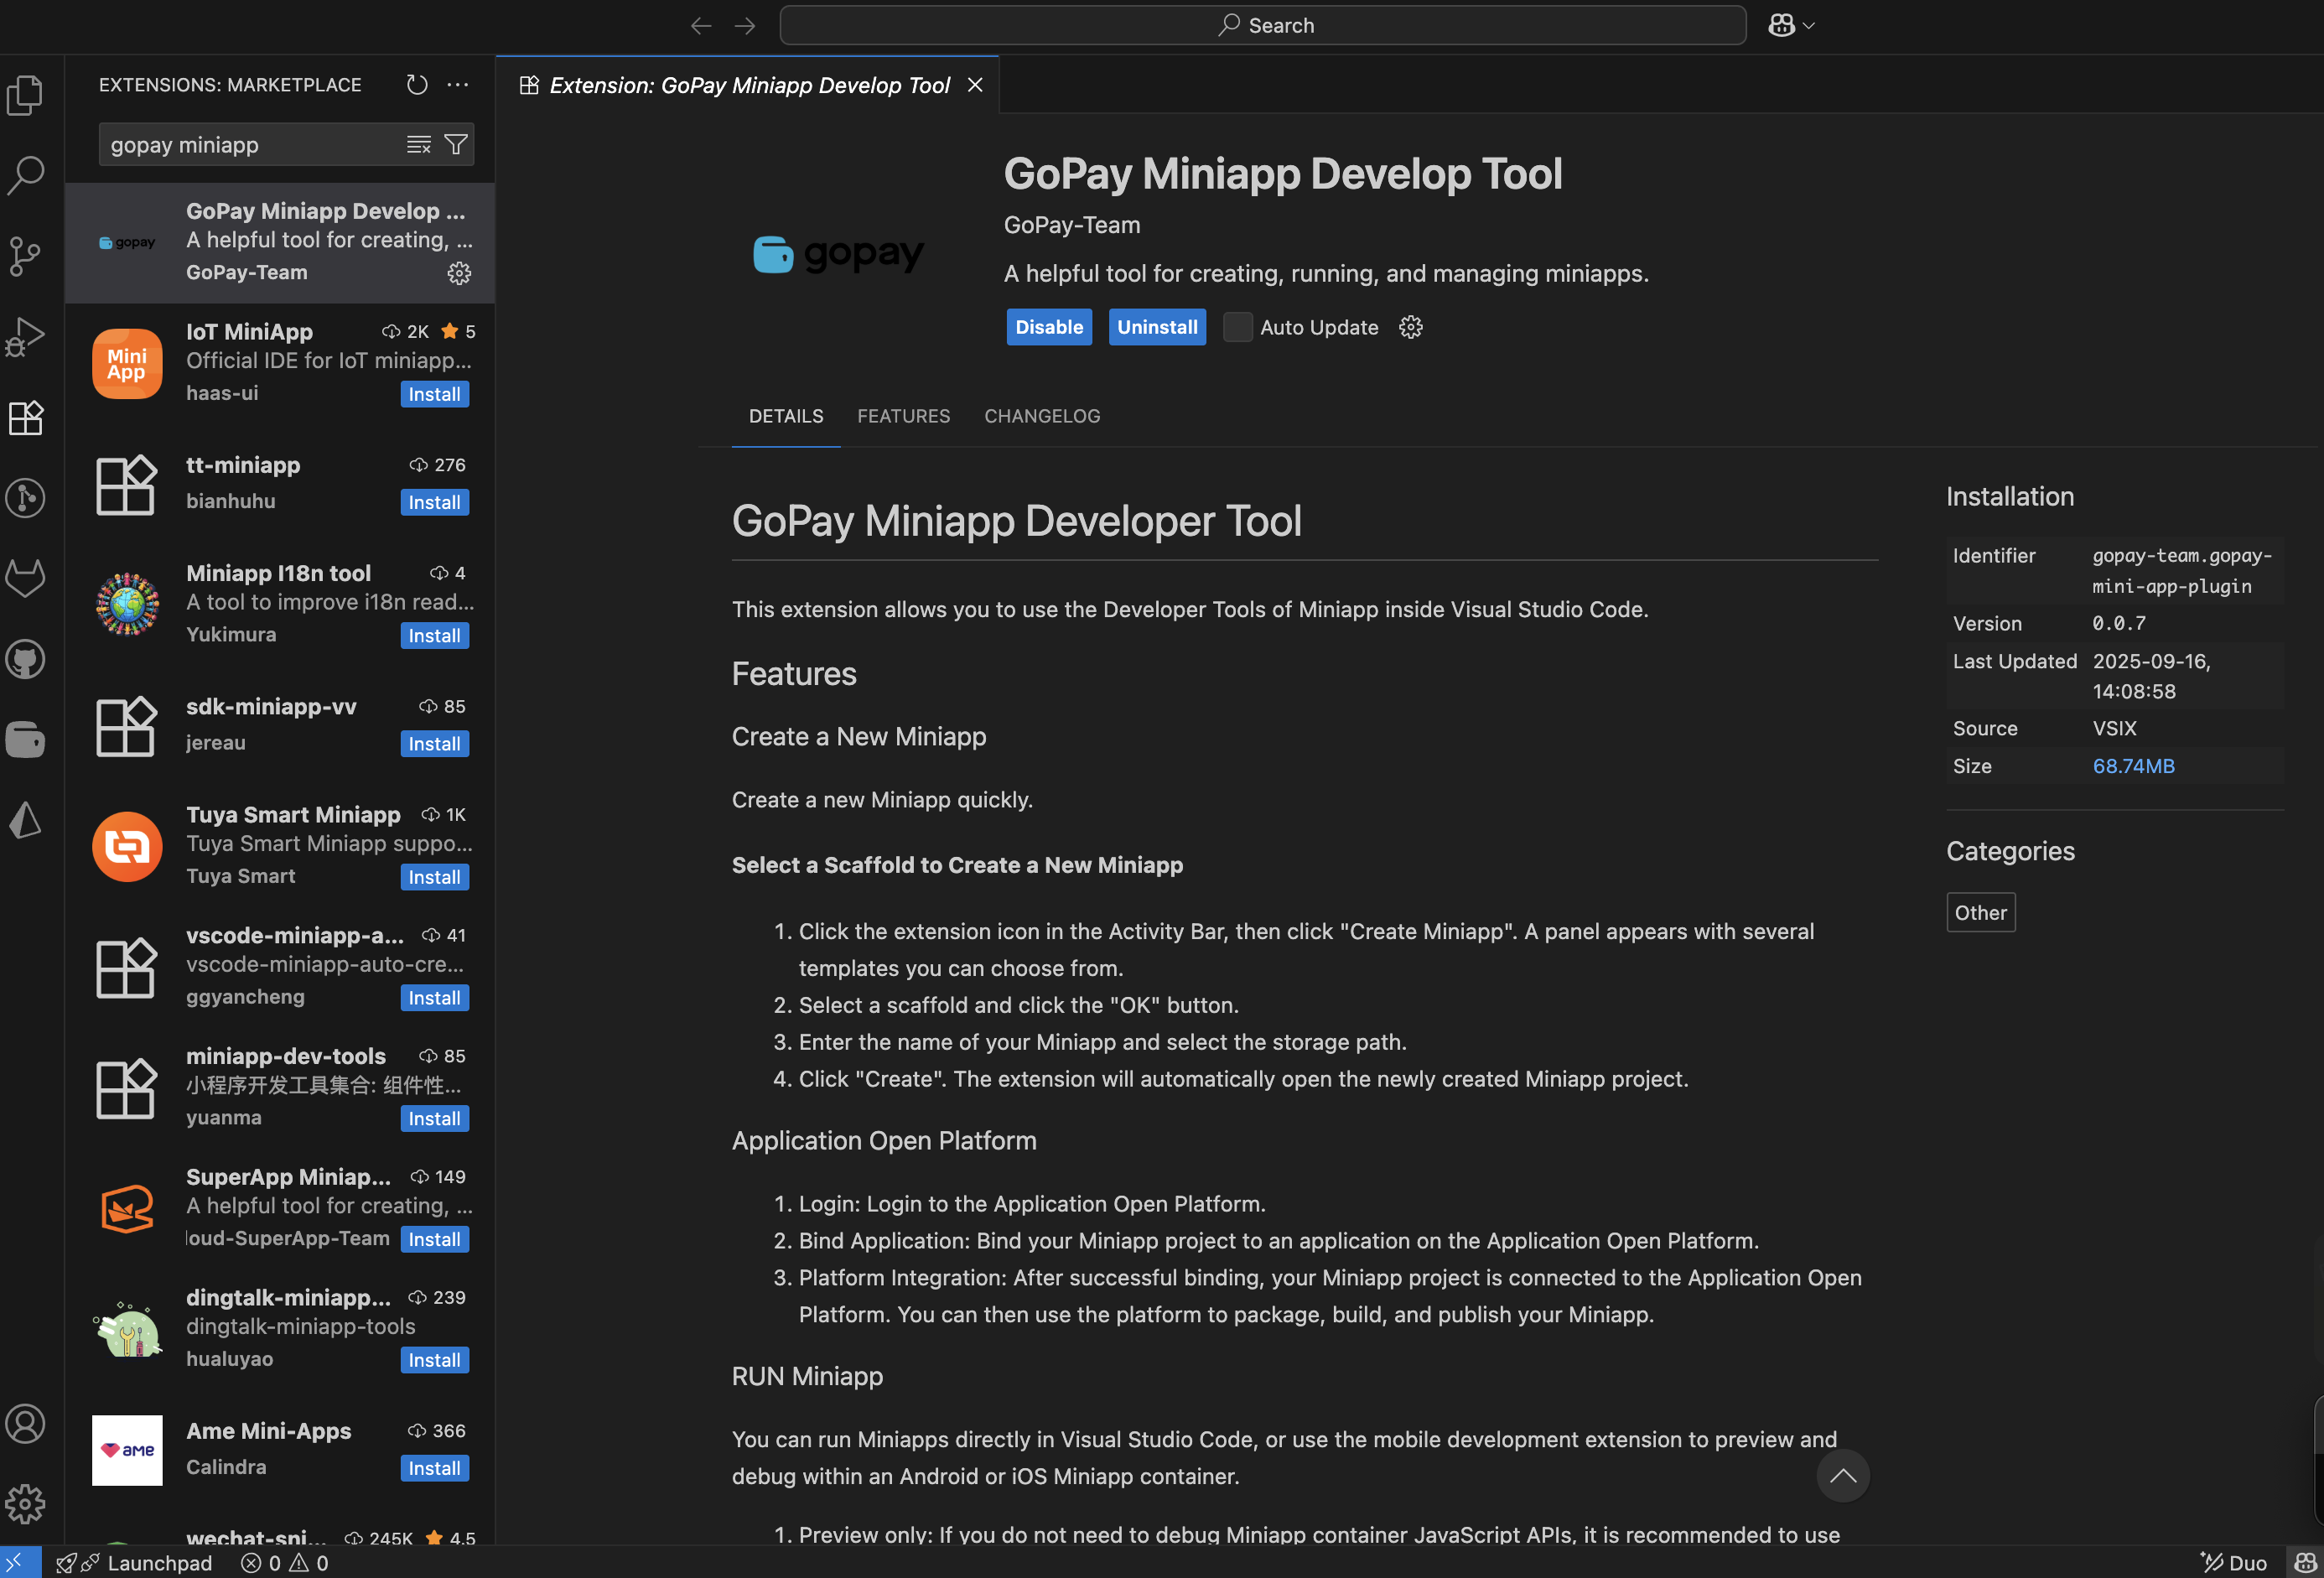
Search for “gopay miniapp”.
-
Find the installed plugin named Gopay Miniapp Develop Tool by searching in the extension search bar.
-
If your VS Code supports auto-updates, enable Auto Update after installing
-
-
Open plugin settings
-
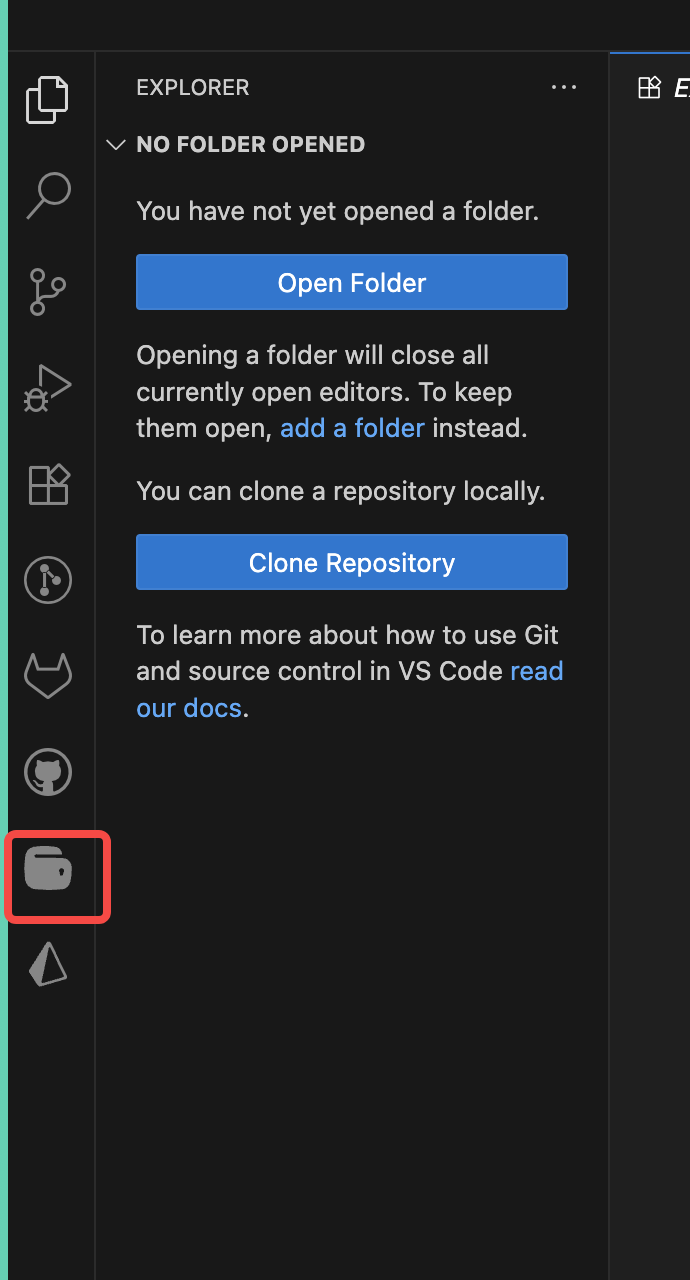
Once installed, click the plugin’s sidebar icon (it appears under the VS Code icon bar).
-
In the Gopay Miniapp Develop Tool panel, select Extension Settings

-
-
Configure required settings
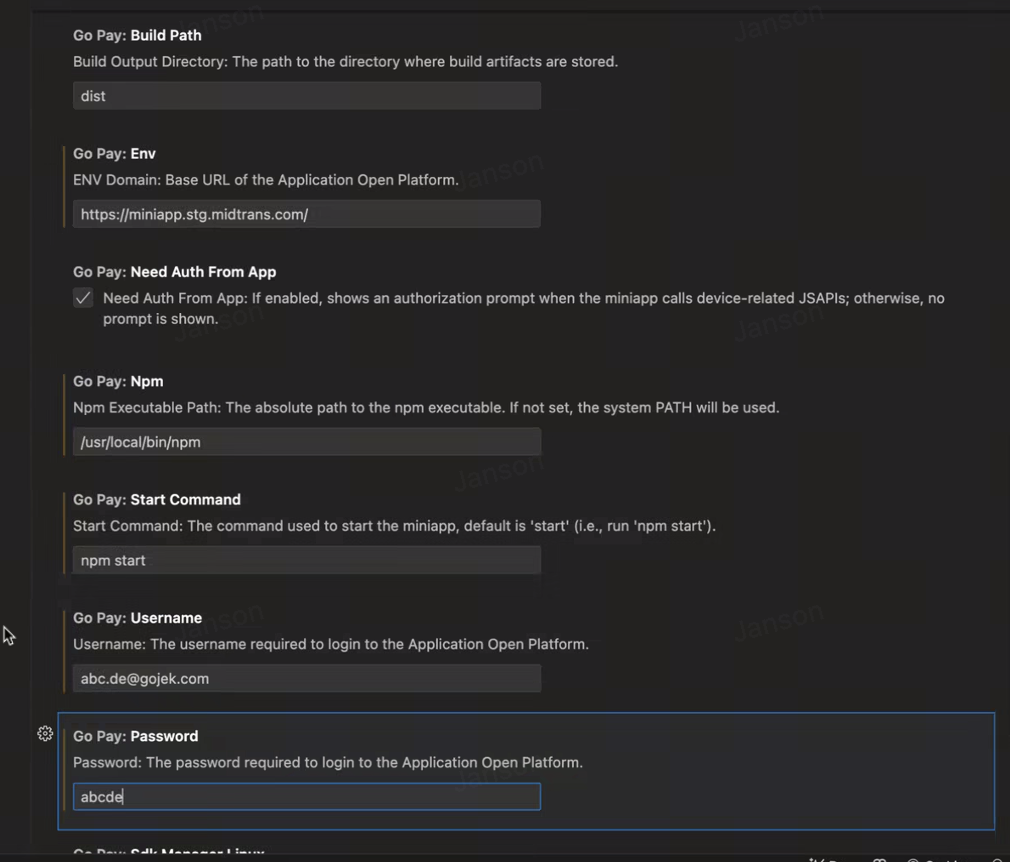
Fill in these parameters in the settings:-
Make sure you change these information as follows and restart the VSCode
- Go Pay: Env to [https://miniapp.midtrans.com]
- Go Pay: Username to [Portal username]
- Go Pay: Password to [Portal password]
- Restart VSCode to apply the changes
-
| Parameter | Description | Mandatory |
|---|---|---|
| Build Path | The directory where the build artifact is stored. Default value: dist. | M |
| Env | The development environment = https://miniapp.midtrans.com | M |
| Need Auth From App | If enabled, invoking client capabilities within the mini-program will prompt for authorization; otherwise, no authorization prompt will be shown. | O |
| Password | The account password used to log on to GoPay MiniApp Portal. | M |
| Username | The account username used to log on to GoPay MiniApp Portal. | M |
| Npm | The storage path of npm commands. | M |
| Start Command | The command for starting the miniapp. Default value: npm start. | M |
| Adb Linux | The storage path of Android adb commands in the macOS system. Default value: ~/Library/Android/sdk/platform-tools. | By Default |
| Adb Mac | The storage path of Android adb commands in the macOS system. Default value: ~/Library/Android/sdk/platform-tools. | By Default |
| Adb Windows | The storage path of Android adb commands in the Windows system. Example: D:\sdk\platform-tools. If your computer runs Windows, you must specify this parameter. If you do not specify this parameter, the Android emulator cannot start as expected. | By Default |
| Emulator Linux | The storage path of Android emulator commands in the Linux system. Default value: ~/Library/Android/sdk/emulator. | By Default |
| Emulator Mac | The storage path of Android emulator commands in the macOS system. Default value: ~/Library/Android/sdk/emulator. | By Default |
| Emulator Windows | The storage path of Android emulator commands in the Windows system. Example: D:\sdk\emulator. If your computer runs Windows, you must specify this parameter. If you do not specify this parameter, the Android emulator cannot start as expected. | By Default |
| Sdk Manager Linux | The storage path of Android sdkmanager commands in the Linux system. Default value: ~/Library/Android/sdk/tools/bin. | By Default |
| Sdk Manager Mac | The storage path of Android sdkmanager commands in the macOS system. Default value: ~/Library/Android/sdk/tools/bin. | By Default |
| Sdk Manager Windows | The storage path of Android sdkmanager commands in the Windows system. Example: D:\sdk\tools\bin. If your computer runs Windows, you must specify this parameter. If you do not specify this parameter, the Android emulator cannot start as expected. | By Default |
| Avd Manager Linux | The storage path of Android avdmanager commands in the Linux system. Default value: ~/Library/Android/sdk/tools/bin. | By Default |
| Avd Manager Mac | The storage path of Android avdmanager commands in the macOS system. Default value: ~/Library/Android/sdk/tools/bin. | By Default |
| Avd Manager Windows | The storage path of Android sdkmanager commands in the Windows system. Example: D:\sdk\tools\bin. If your computer runs Windows, you must specify this parameter. If you do not specify this parameter, an Android emulator cannot be created. | By Default |
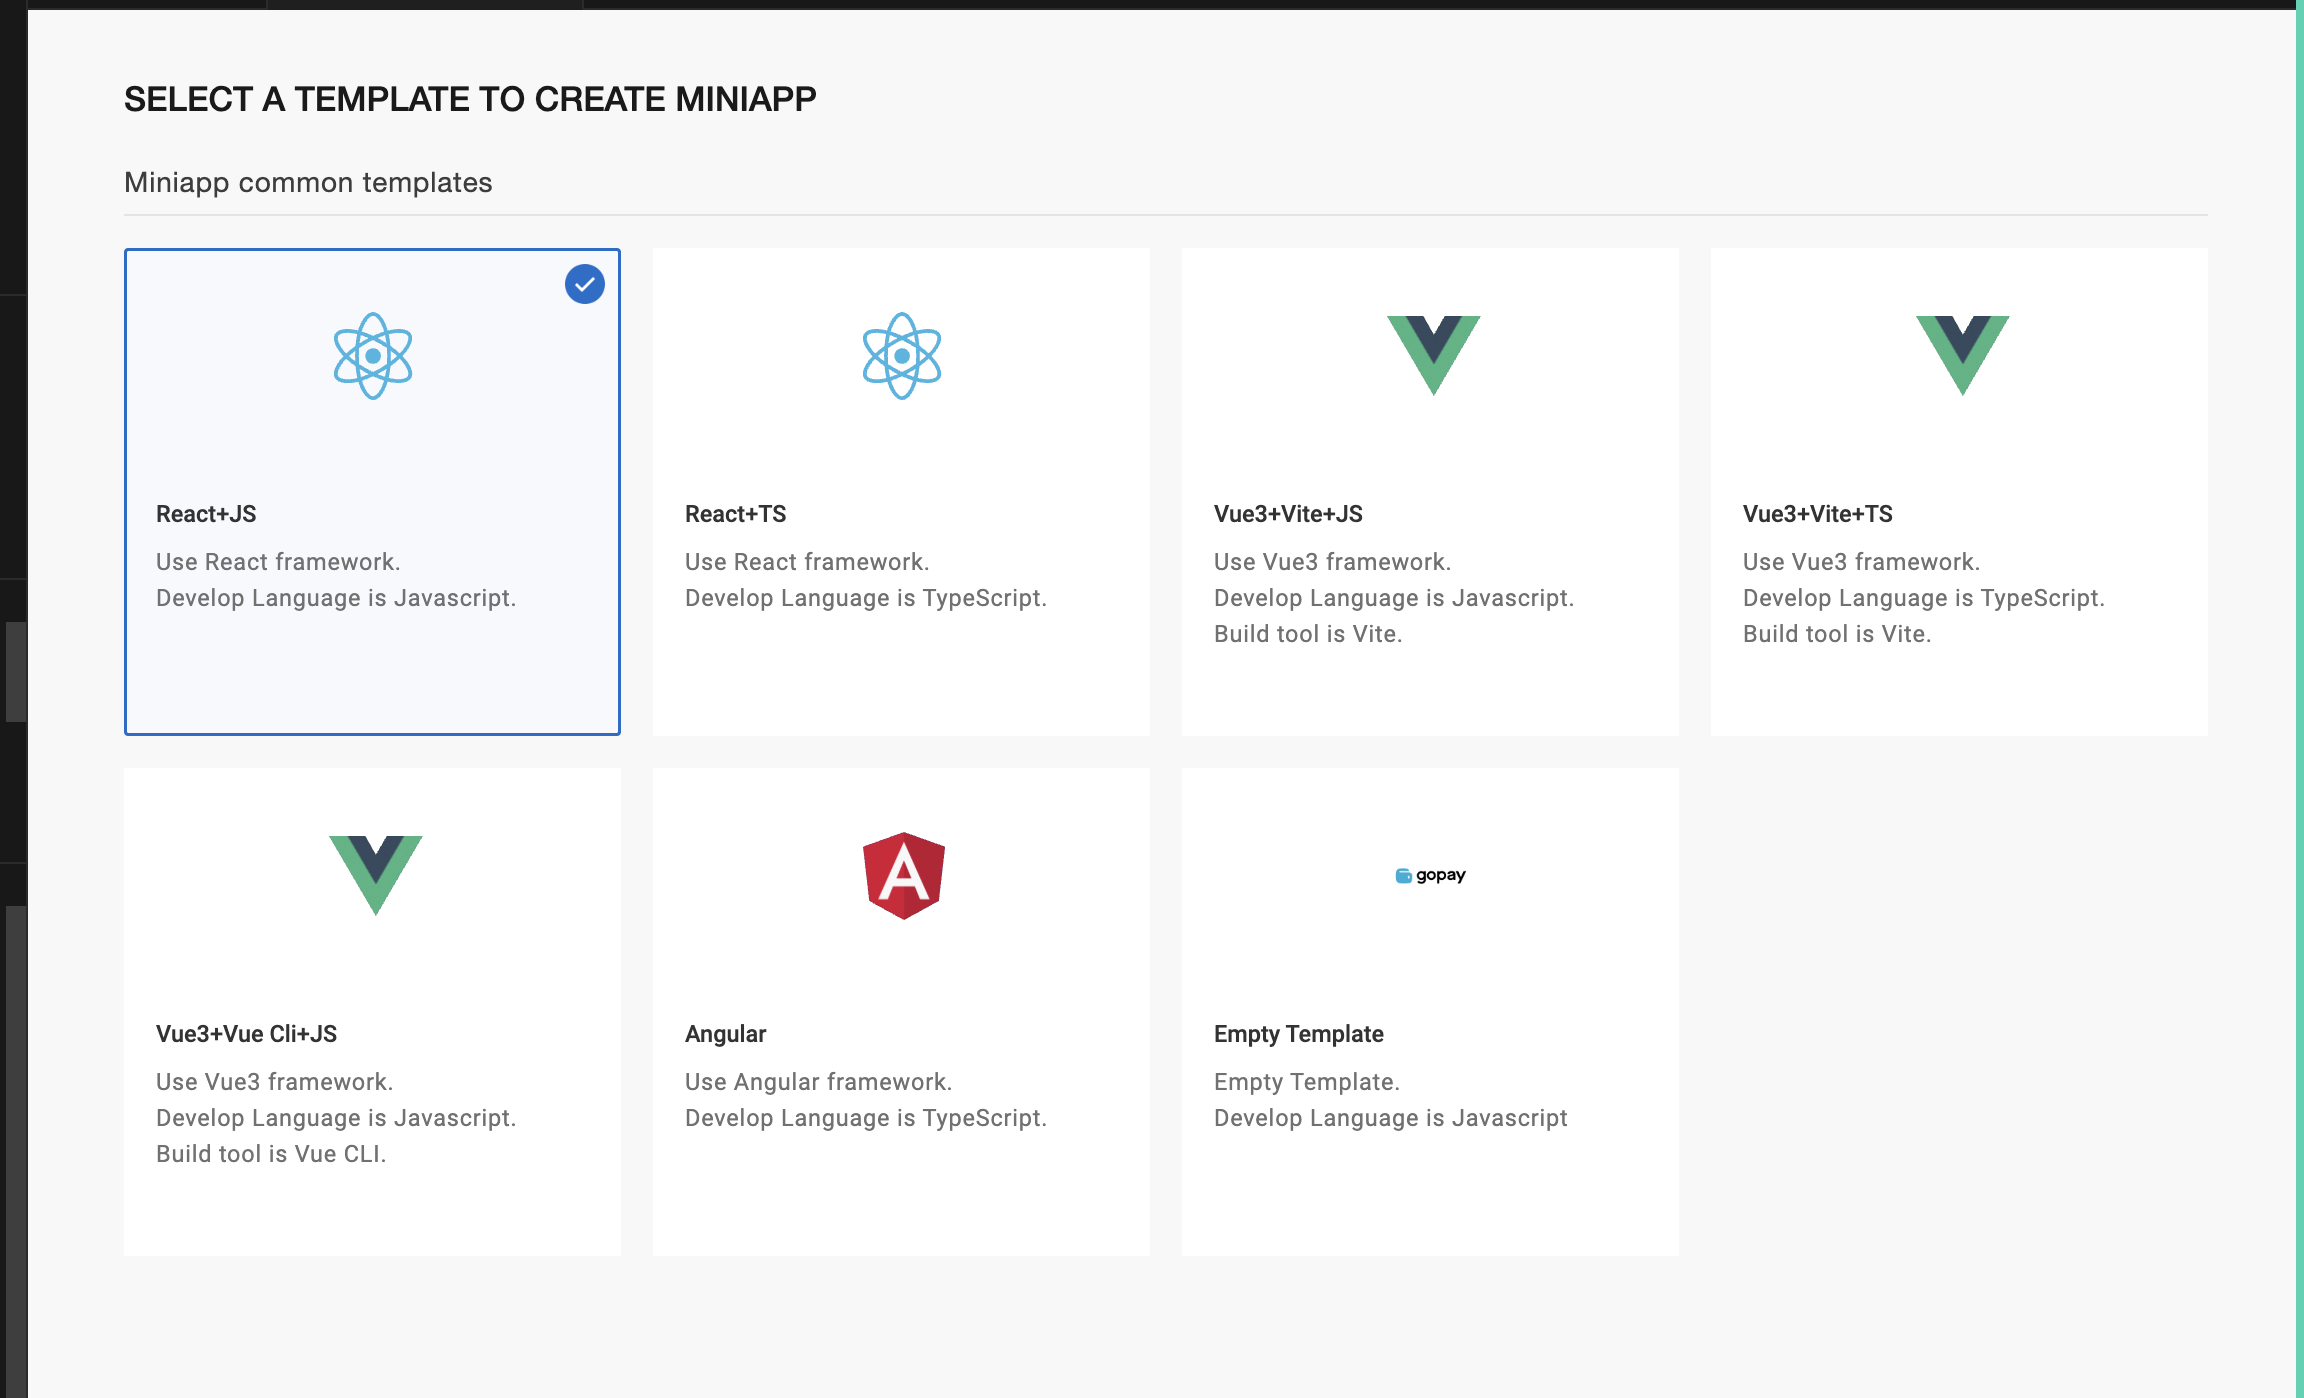
Create project scaffold for MiniApp
-
Prepare your environment
- Ensure Visual Studio Code and Node.js (latest) are installed.
-
Initialize the scaffolding
-
In VS Code, click the GoPay icon in the sidebar and choose Create Miniapp.
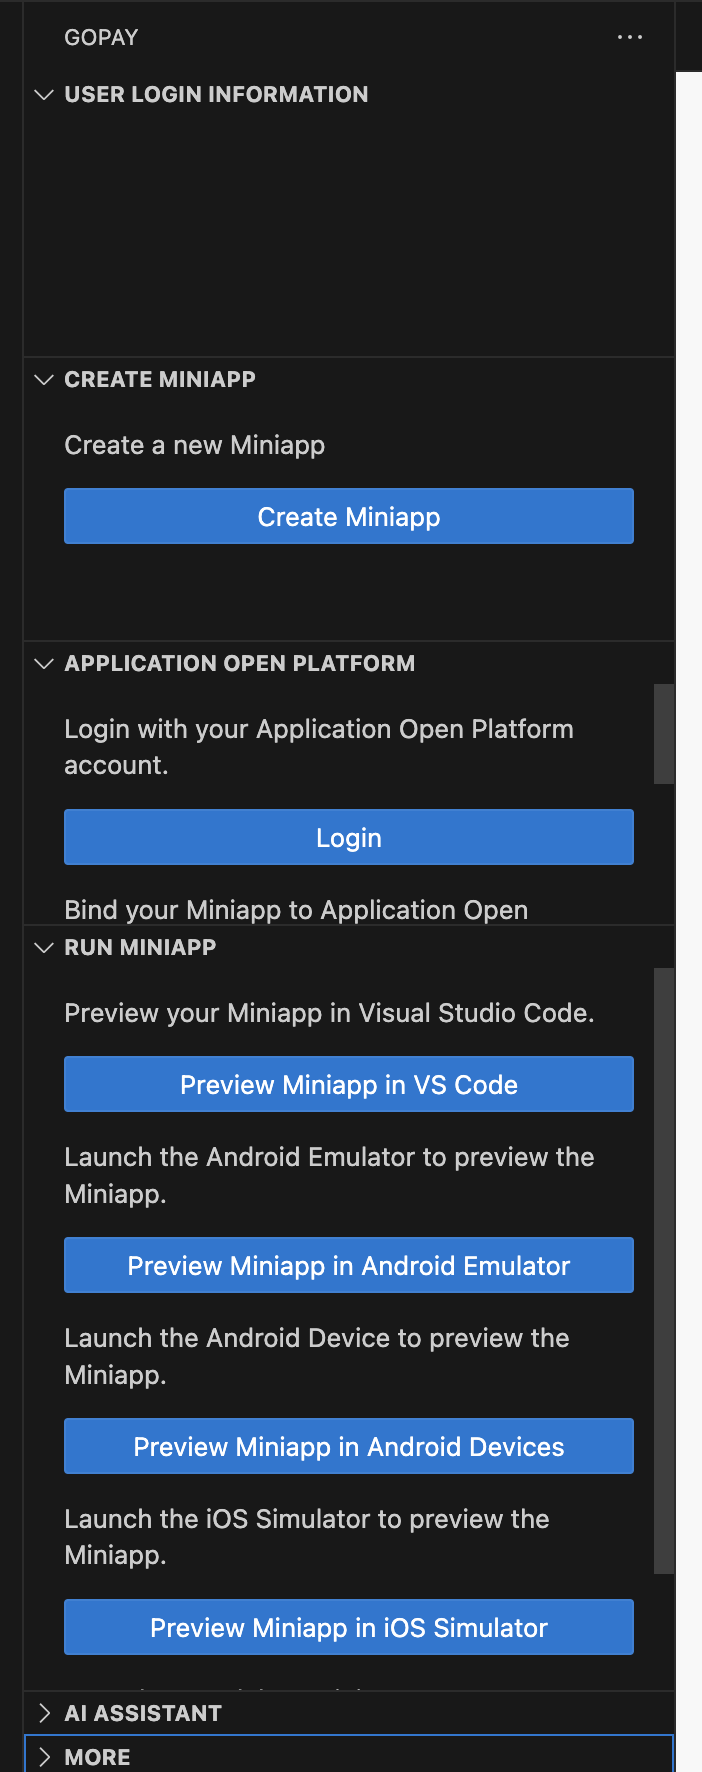
-
Pick a template (React, Vue, Angular, or plain JS).
-
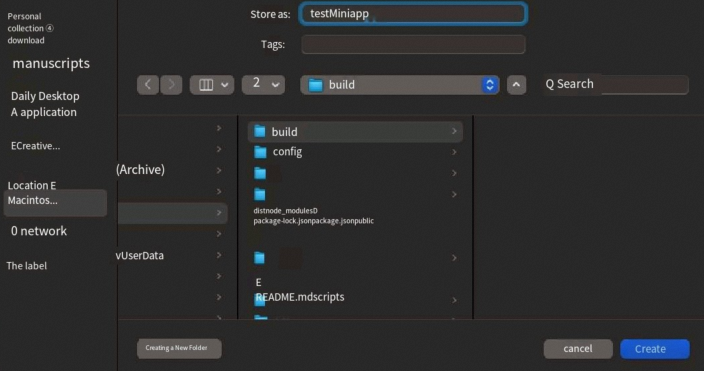
In the dialog, name your miniapp and select the project folder, then click Create. This opens the new project in VS Code automatically
-
-
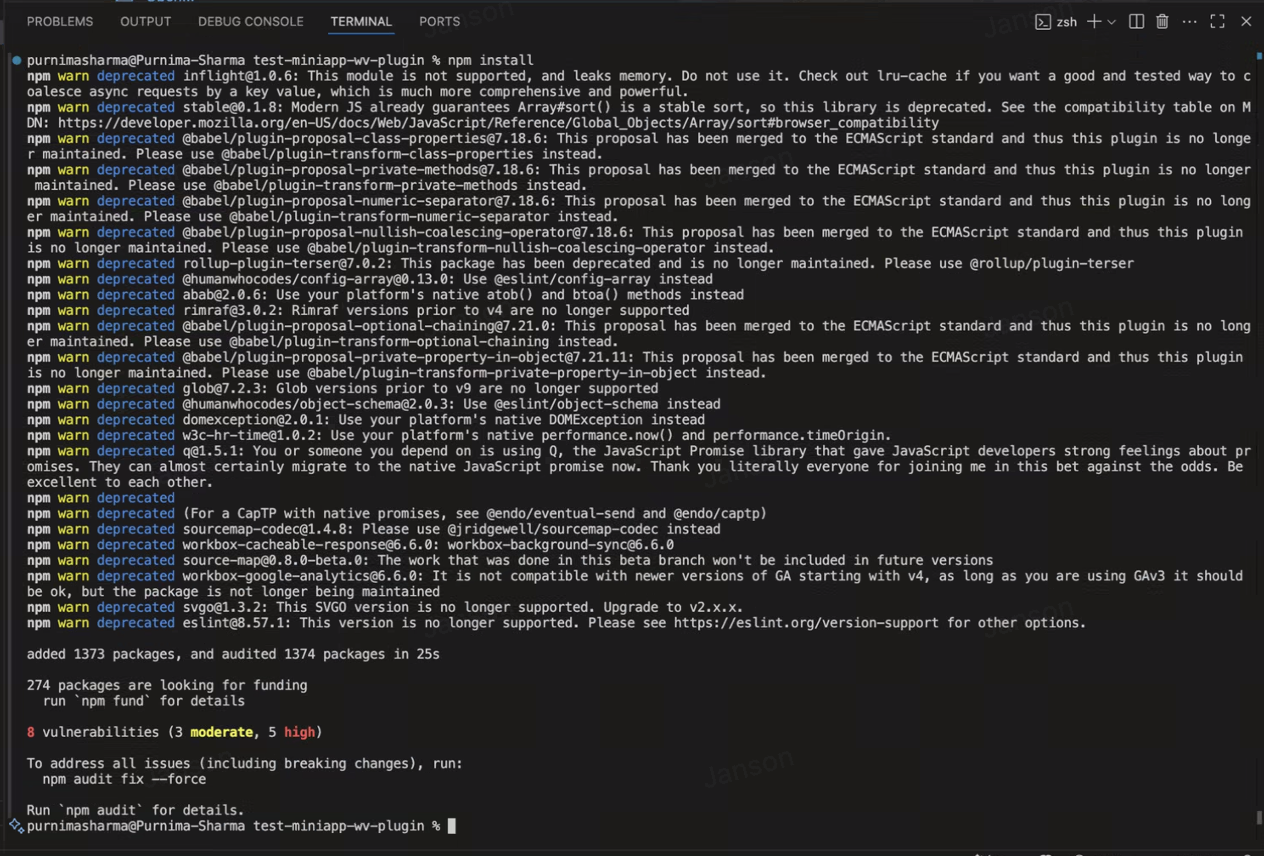
Install dependencies
-
Open the integrated terminal and run:
npm install -
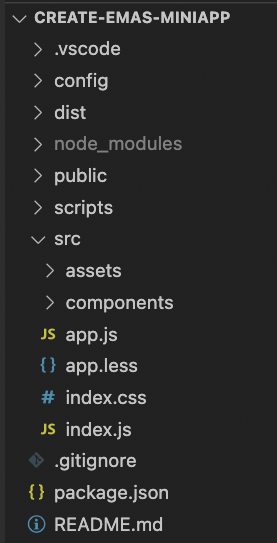
Your project file
-
-
Explore project structure
Afternpm install, your project will include:- public/ – static assets
- scripts/ – build scripts
- src/ – source code (assets/, components/, index.js)
- package.json – project metadata & scripts
- node_modules/ – installed dependencies
- dist/ – build output (after packaging)
-
Integrate JavaScript APIs
-
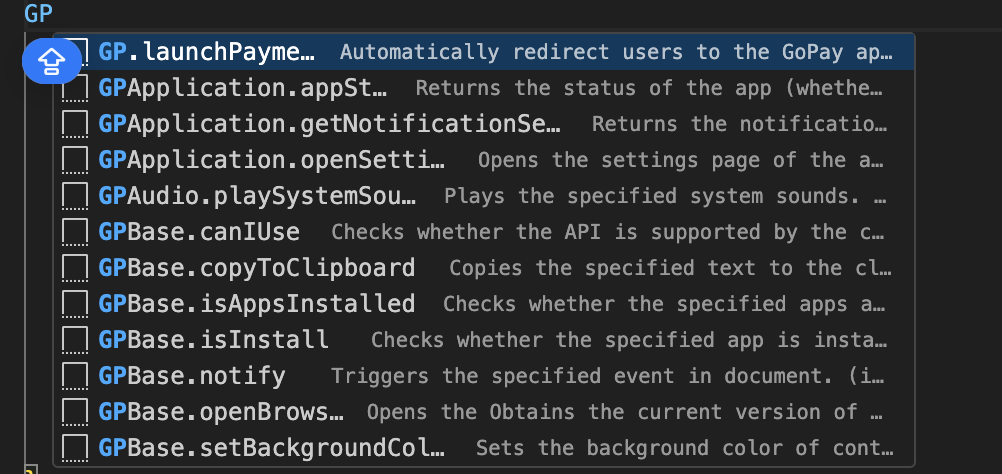
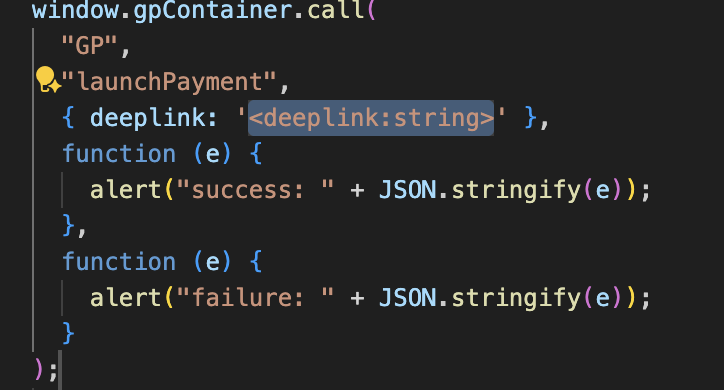
In .js or .ts files, type GP to trigger IntelliSense suggestions for GoPay Container SDK JS APIs(available on Visual Studio Code).
-
Select an API snippet to auto-insert usage code.
-