
1. Onboard to GoPay Mini App Portal
Please follow the steps below to gain access:
- Complete the GoPay Mini App Portal Submission to request login access.
Kindly check your email after 1-2 days. - Log in Gopay Mini App Portal and fill out required details and submit.
Kindly check the portal again 1-2 days after approval from GoPay.
You may contact support team if needed.
2. Create New MiniApp Project
-
Log in to the Gopay Mini App Portal.
-
Create a Miniapp
-
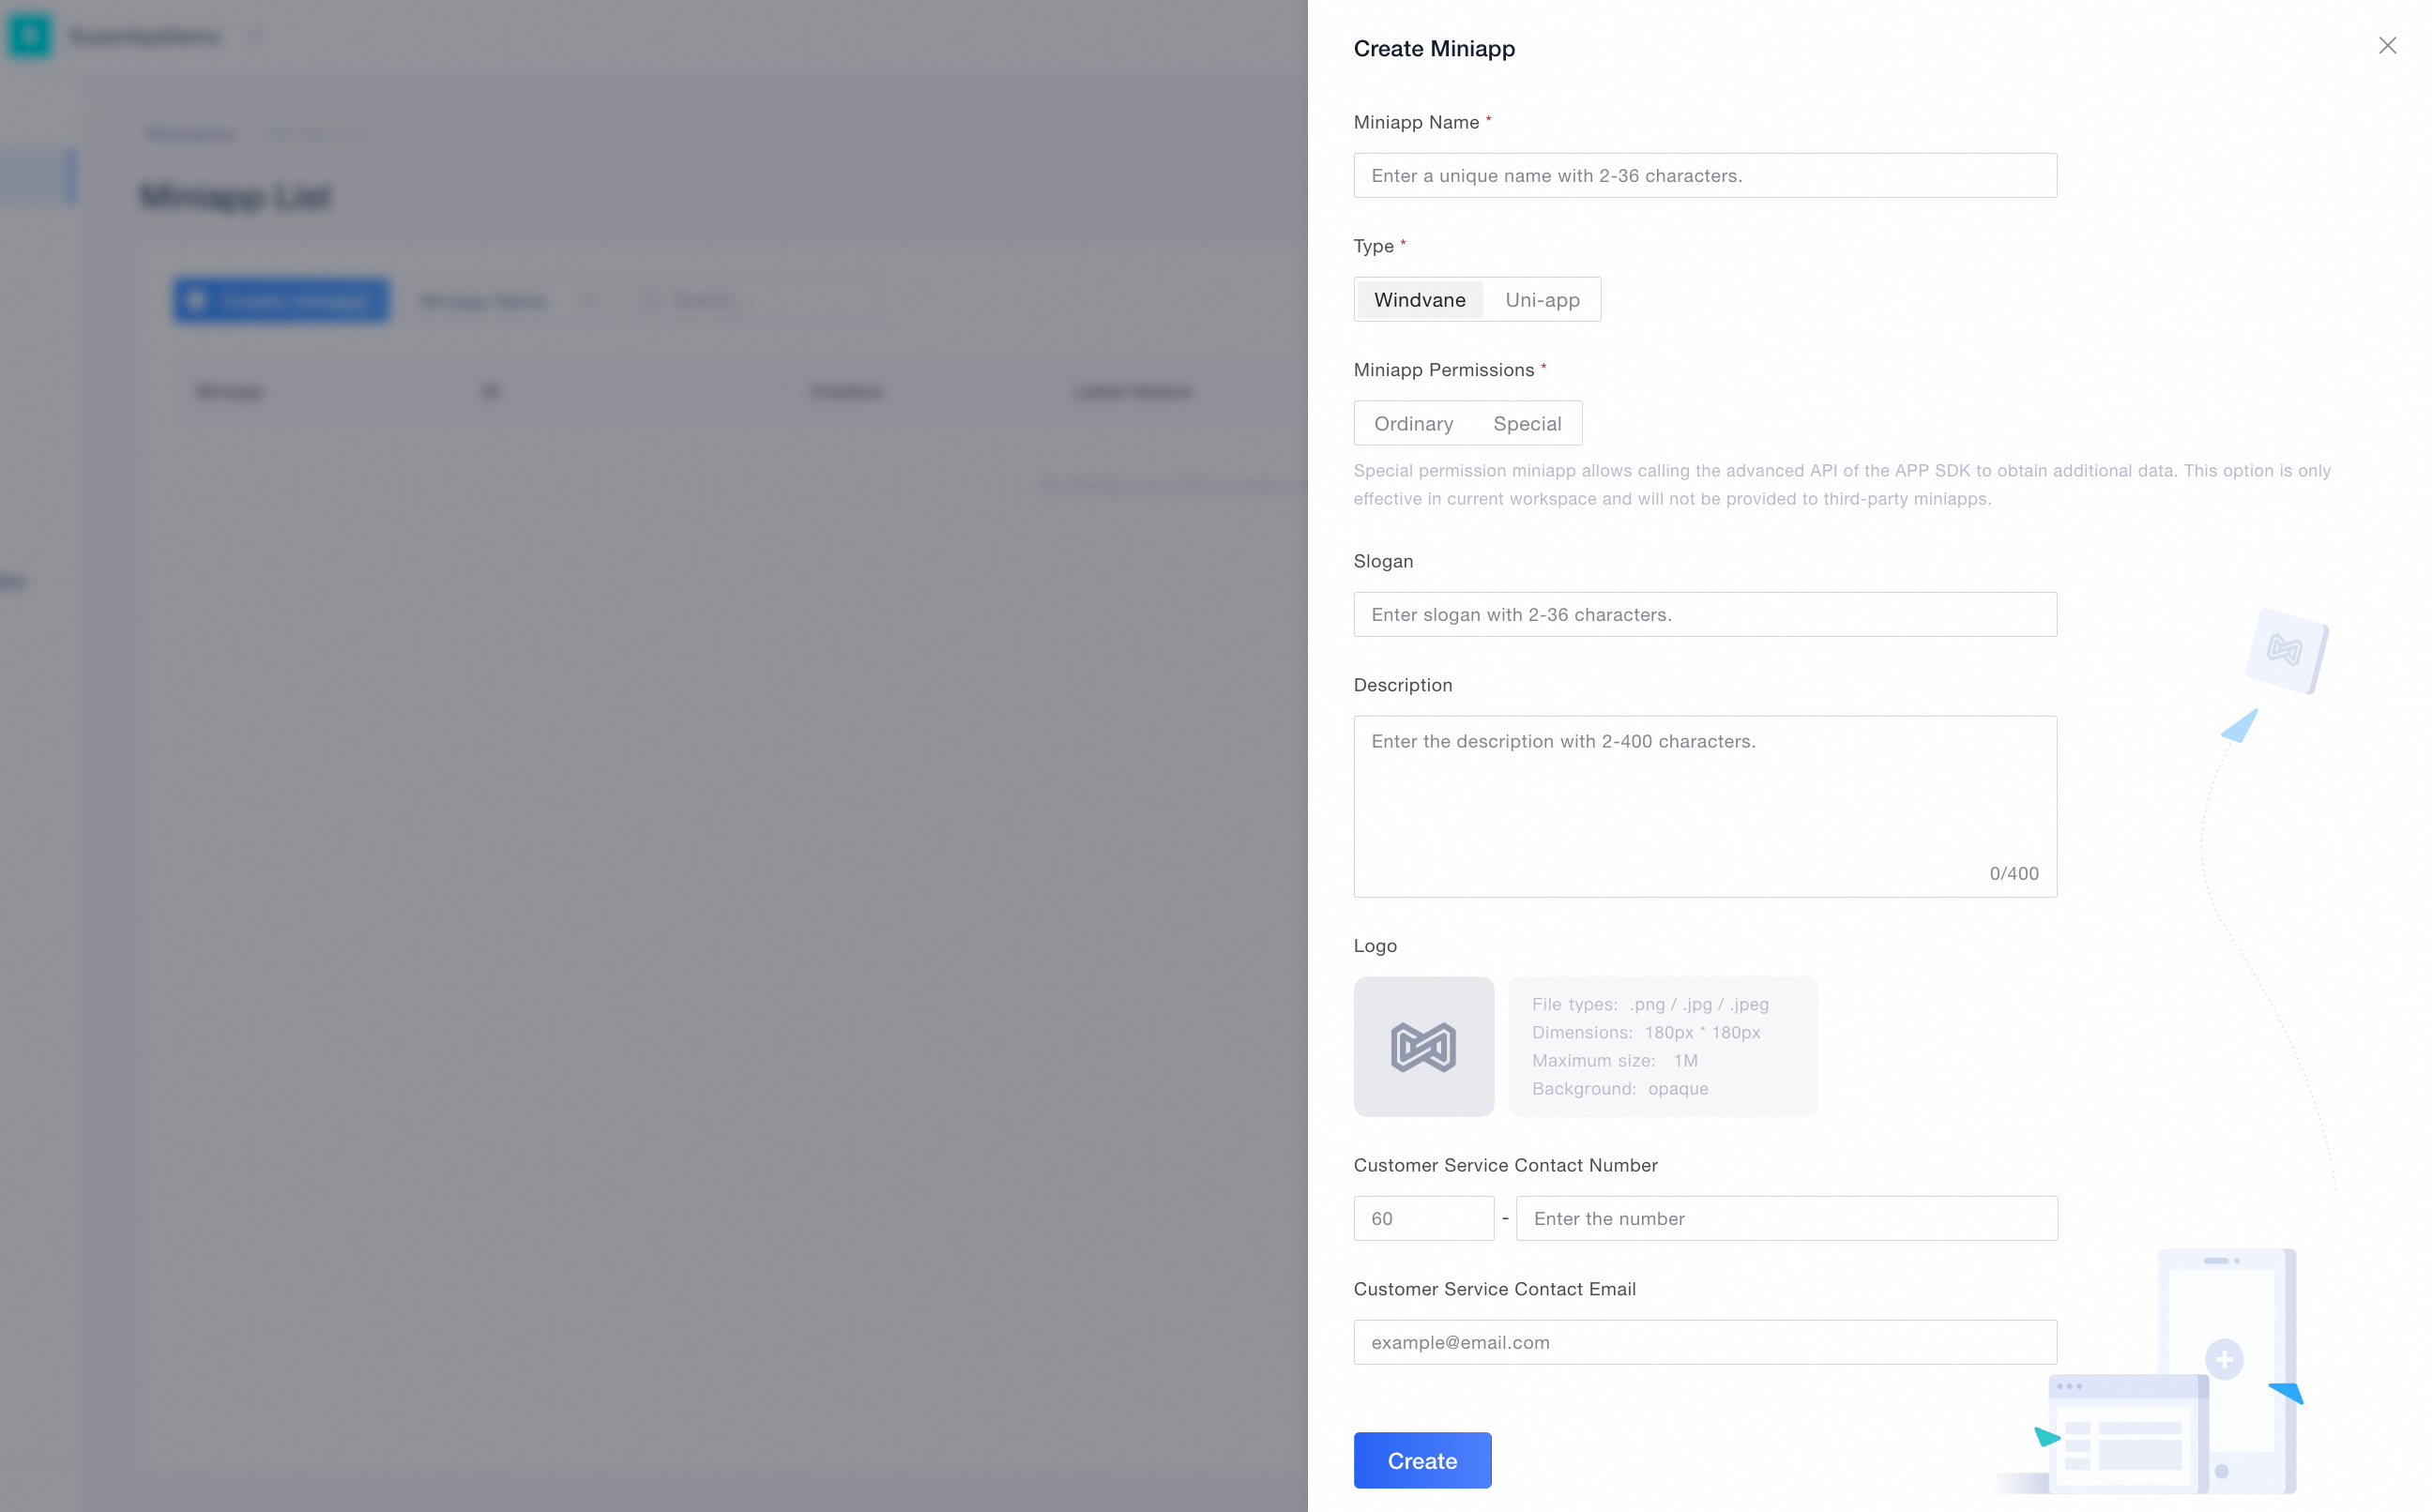
If you don’t have one yet, go to the MiniApp page and click “Create Miniapp.”

-
Fill in the required info: name, type (only windvane), permissions, description, logo, contact info, etc. Click “Create” to finish
-
-
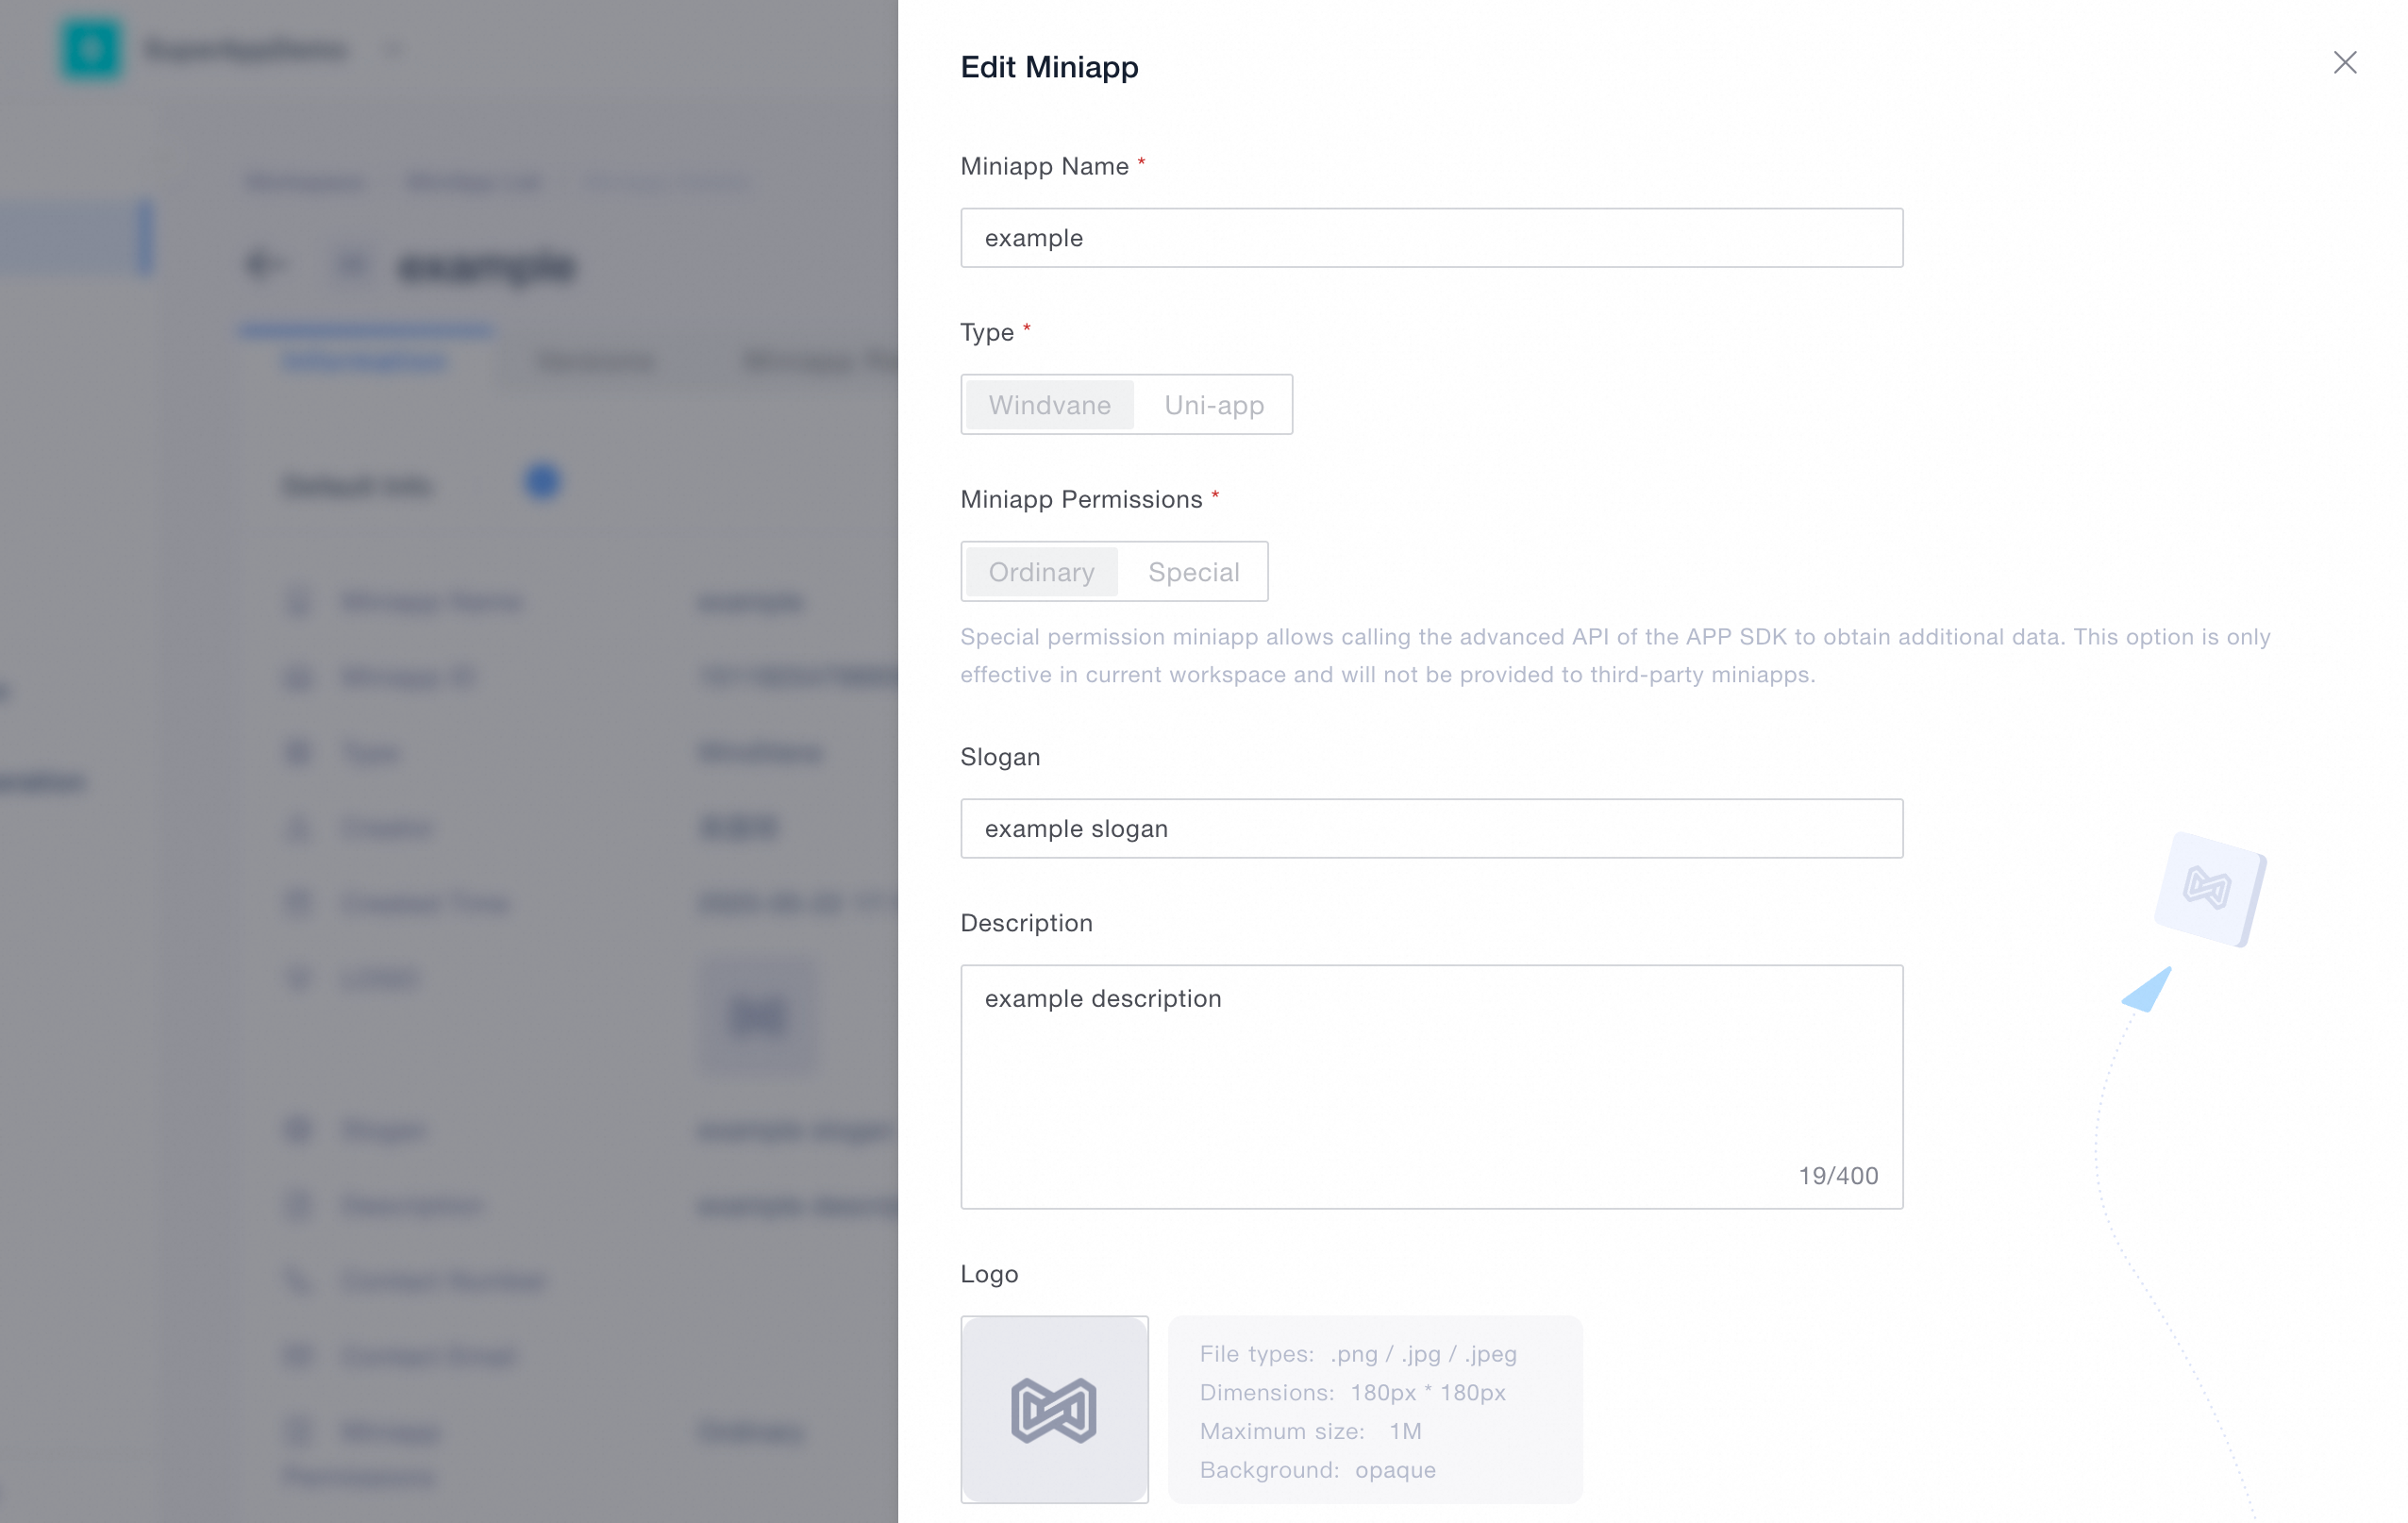
If a MiniApp already exists, you can skip creation and proceed to edit or publish it.
-
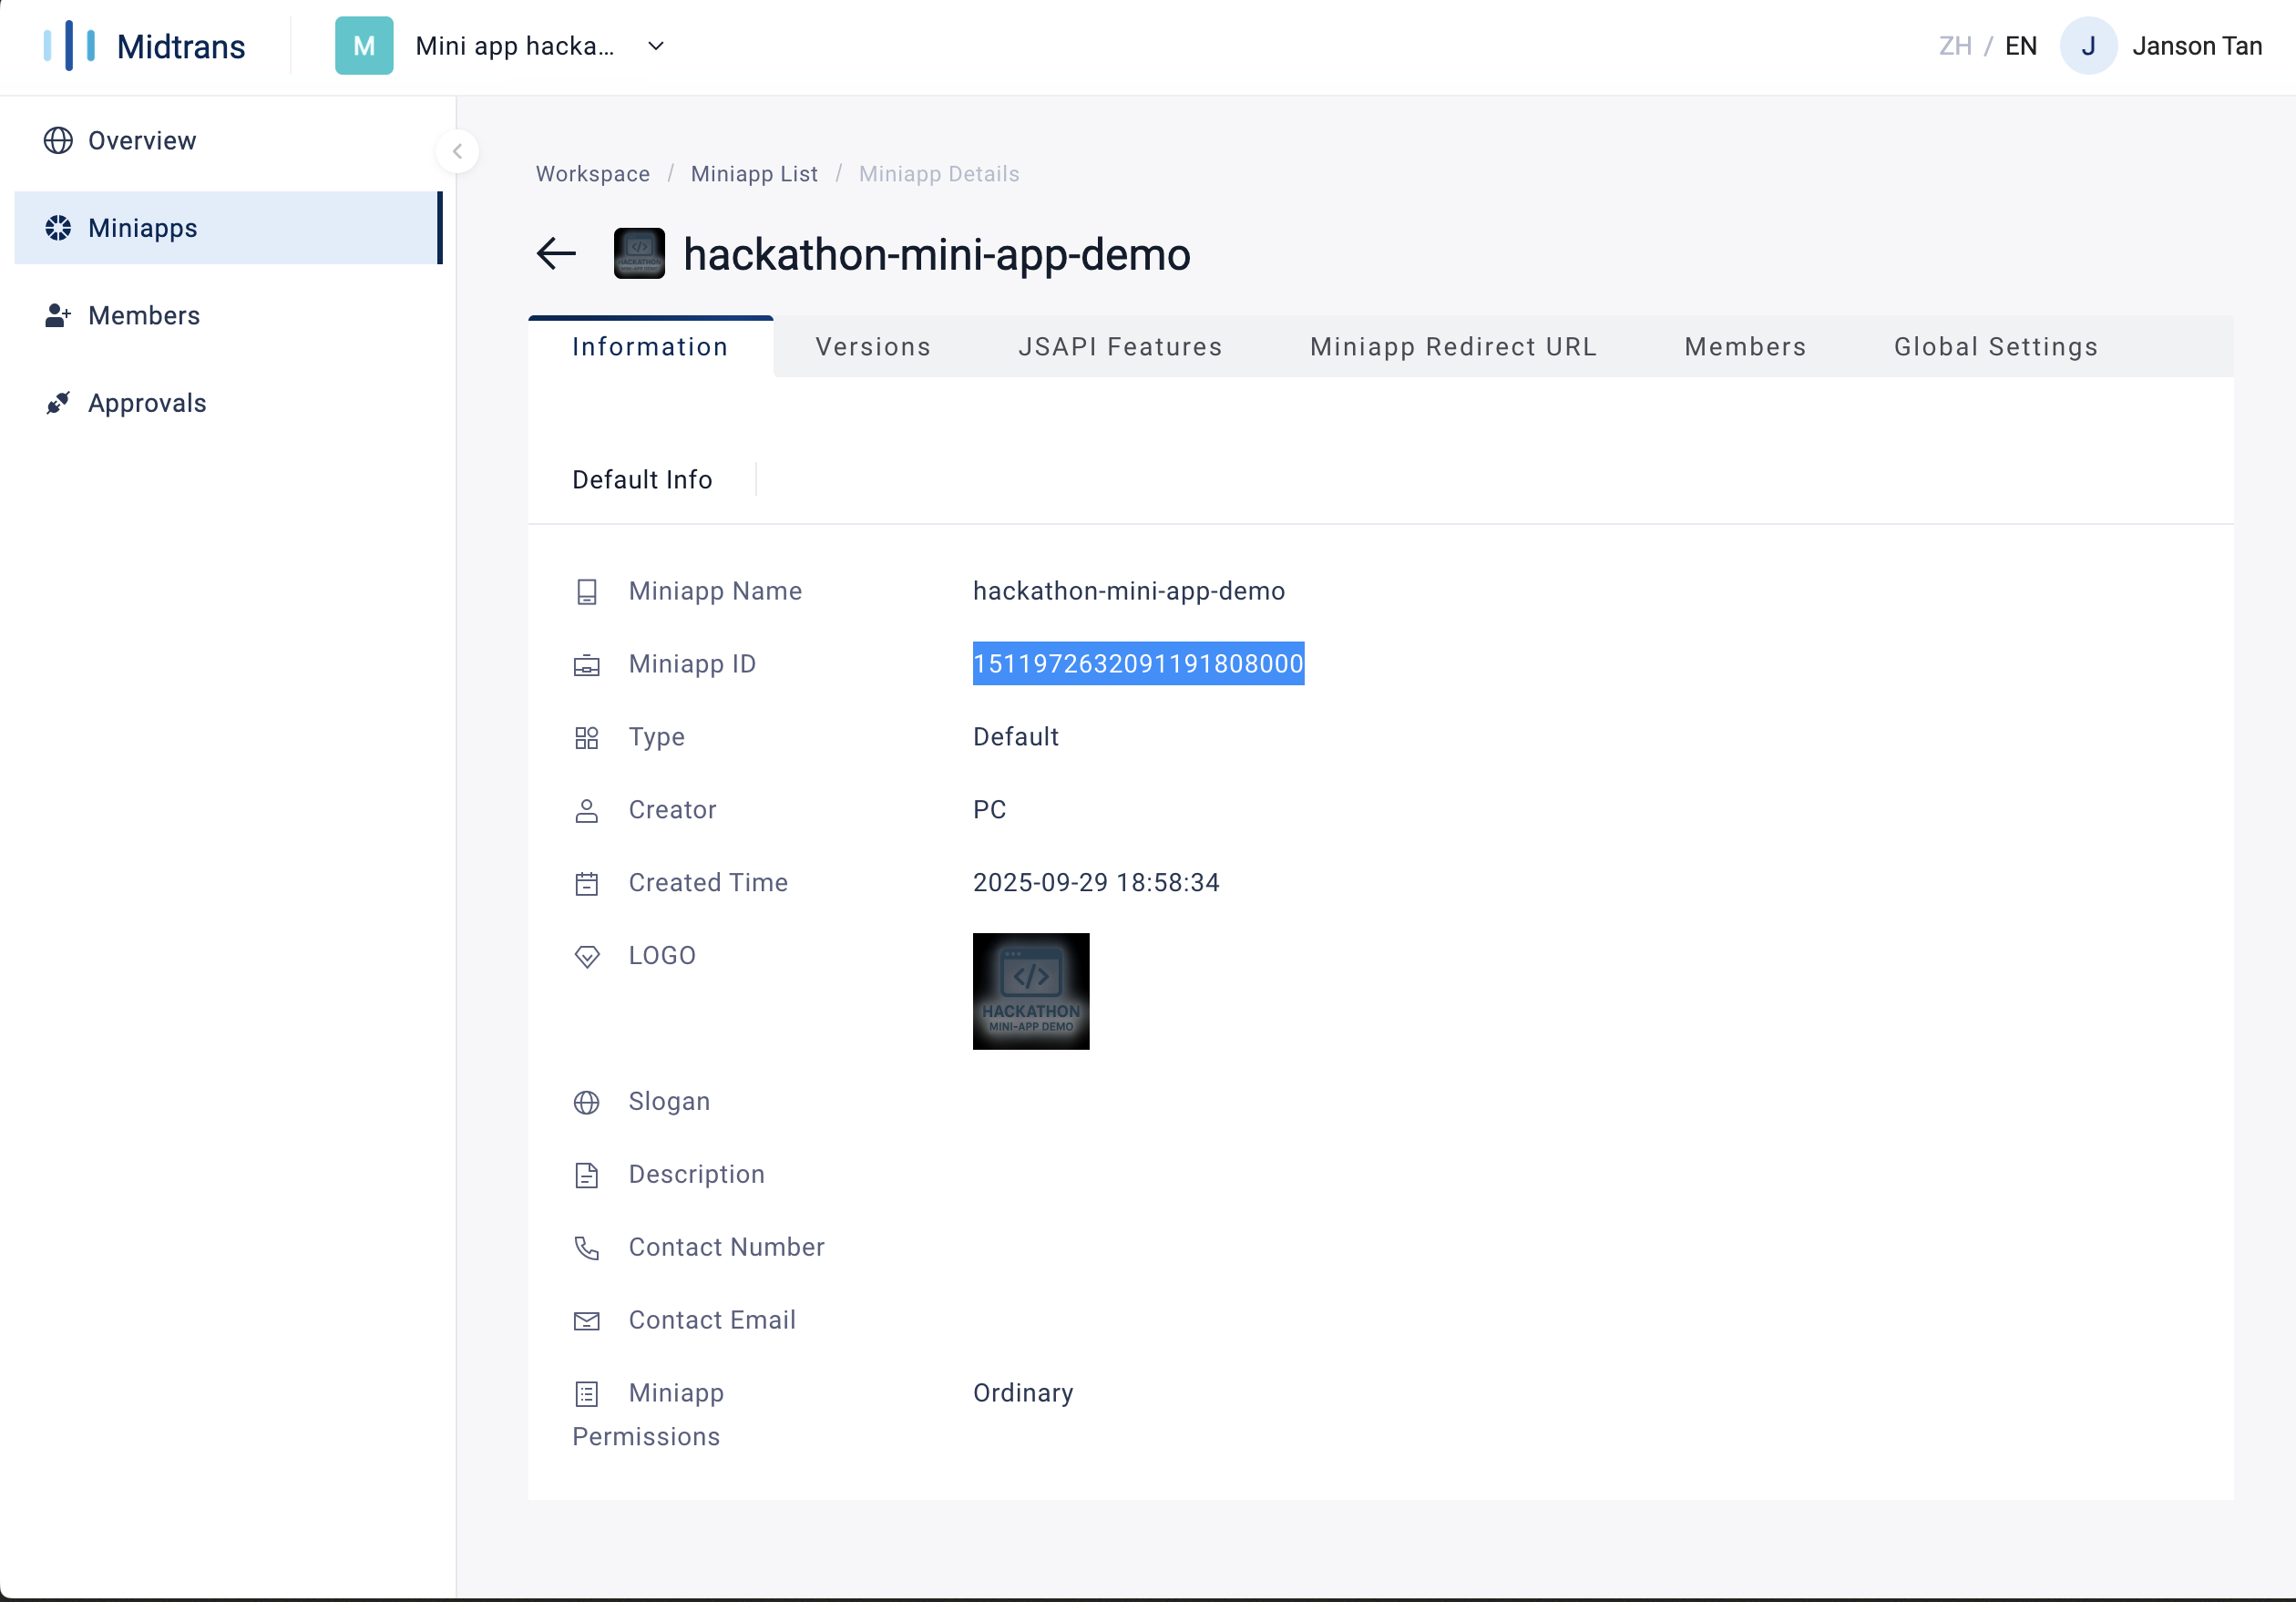
Took note of the Miniapp ID
-
Continue to submit form and select "Create new MiniApp" and input Miniapp ID as mentioned in quick start section
3. Project Initial Setup
Install the Visual Studio Code Extension
-
Install the GoPay Mini App Plugin in VS Code
-
Download Gopay VS Code Extension from here
-
Open VS Code.
-
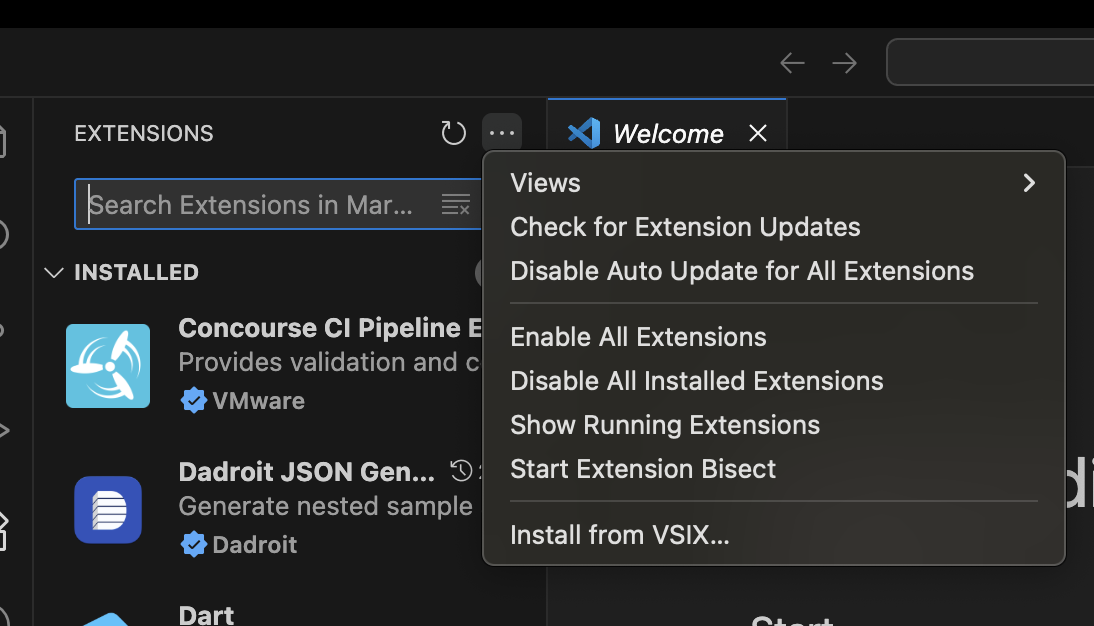
Click the Extensions icon in the sidebar and click (...) symbol.
-
Install from ViX using the downloaded build.
-
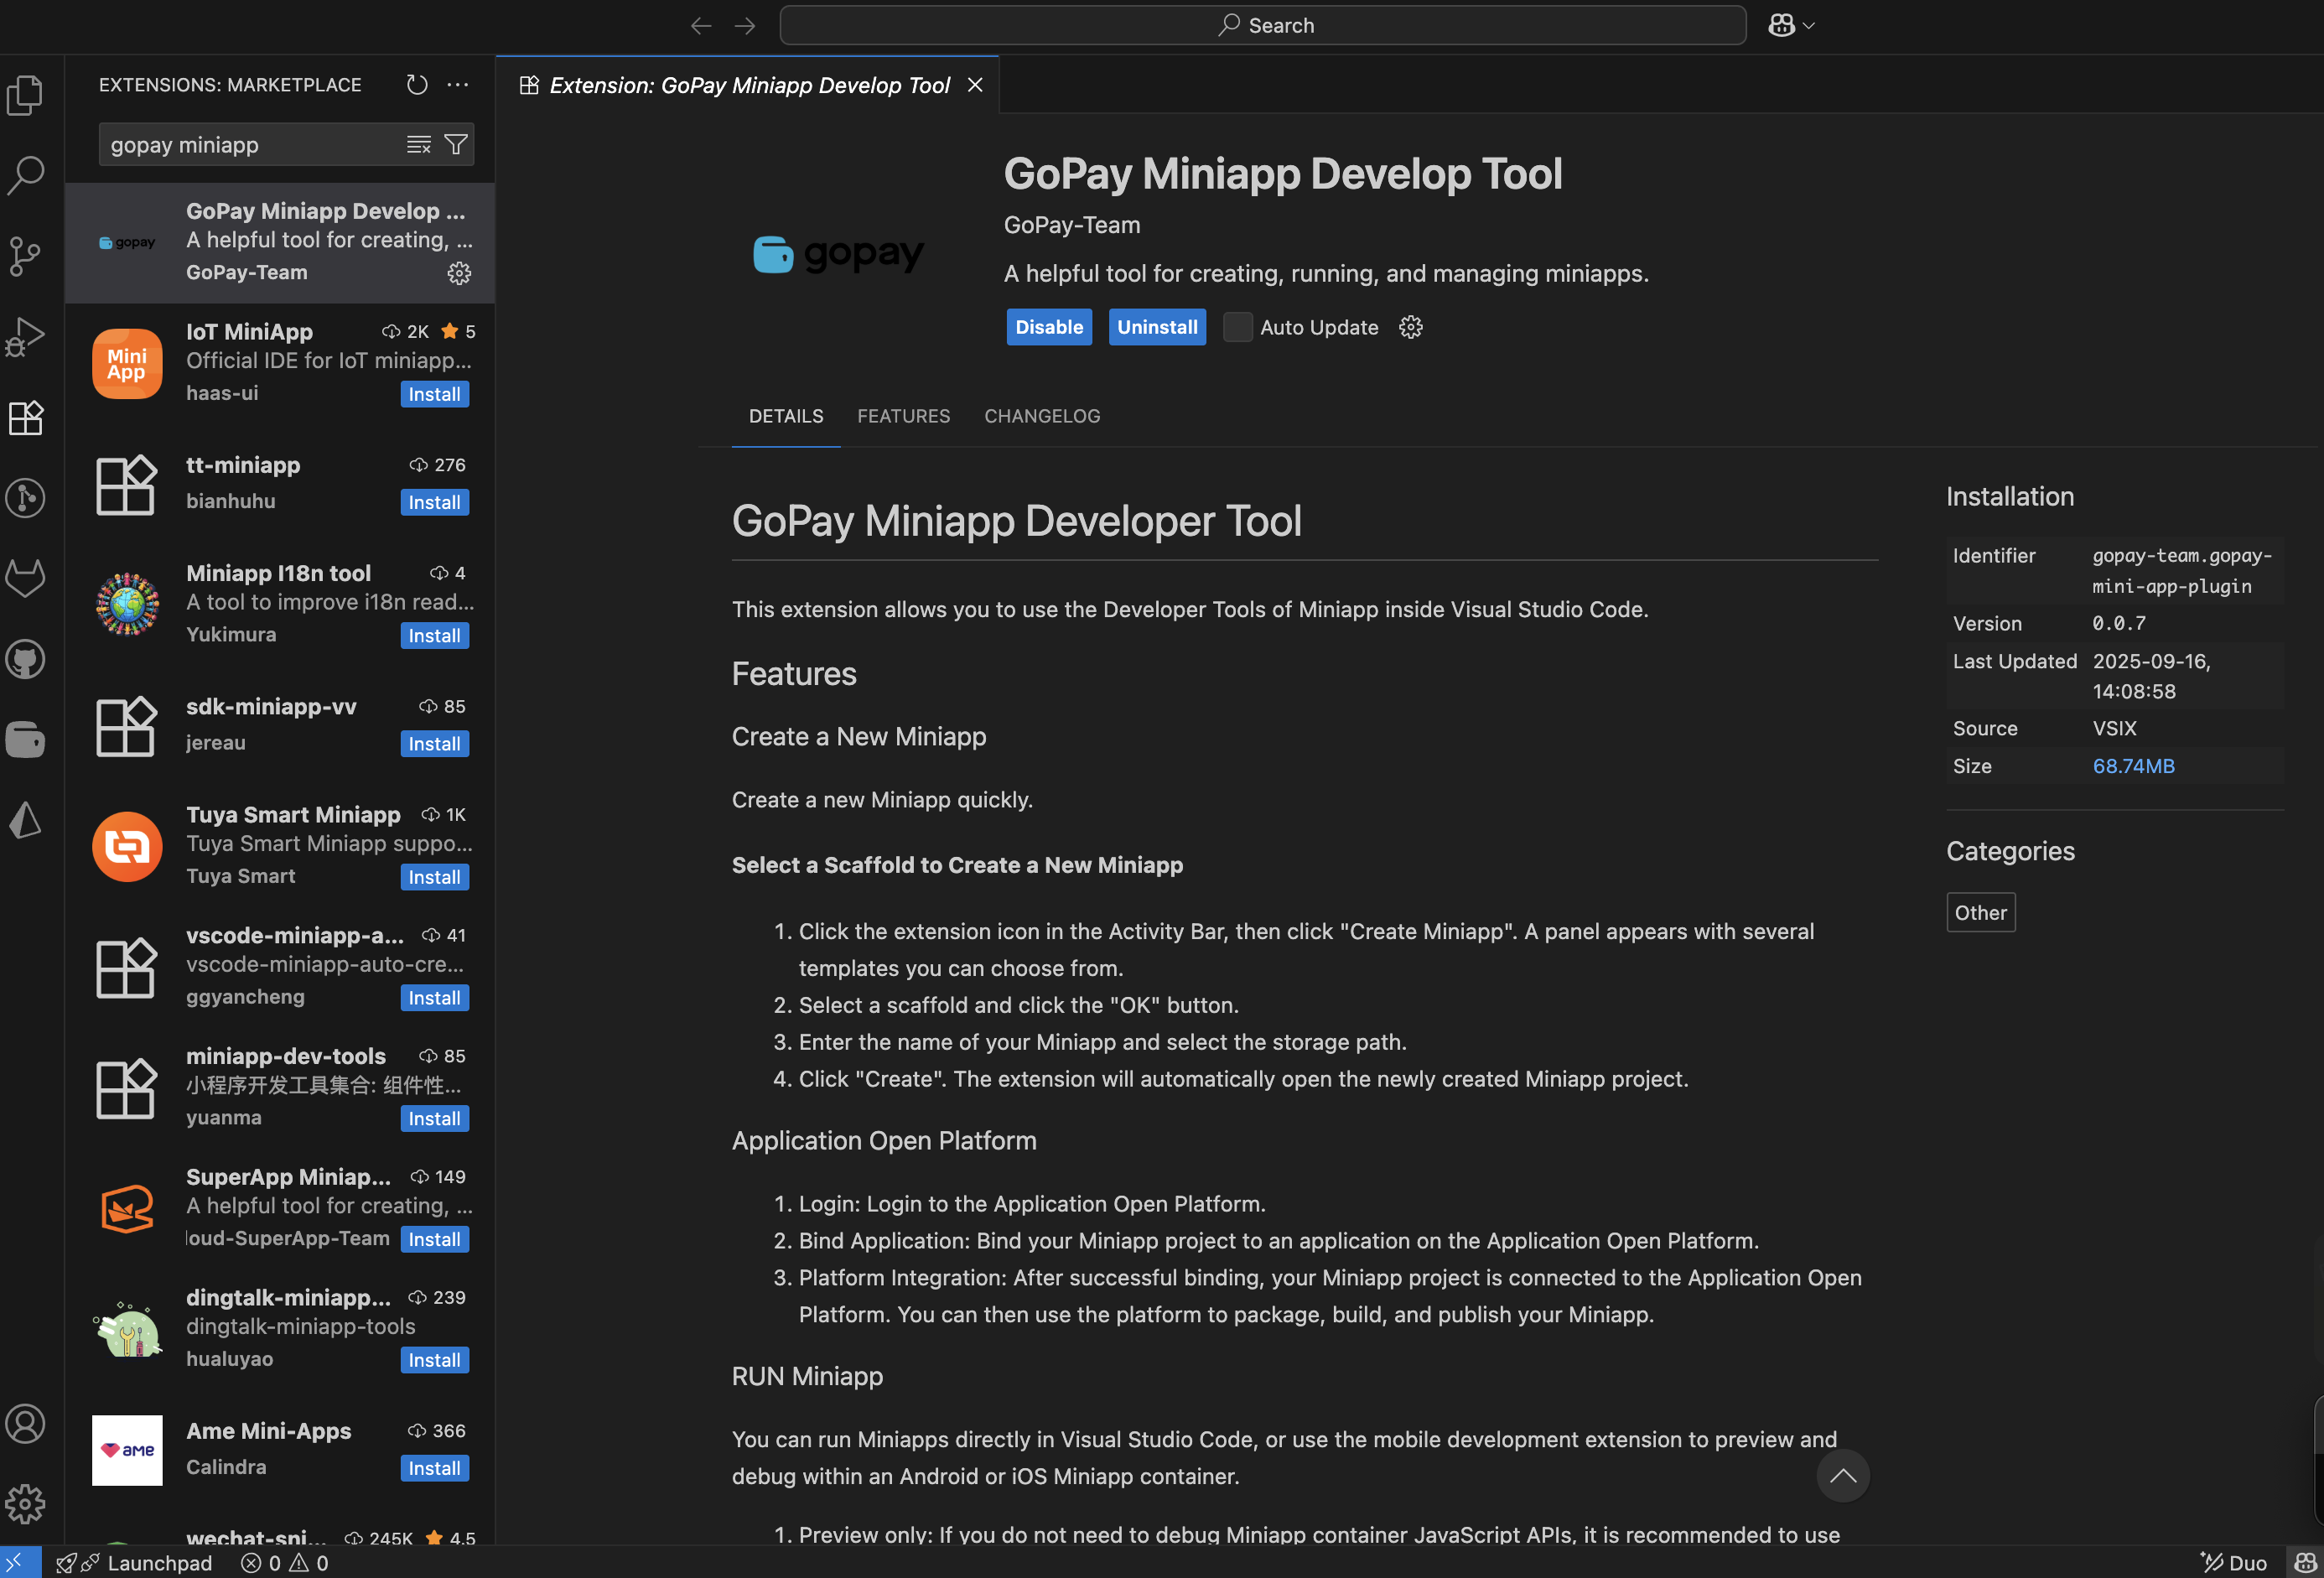
Search for “gopay miniapp”.
-
Find the installed plugin named Gopay Miniapp Develop Tool by searching in the extension search bar.
-
If your VS Code supports auto-updates, enable Auto Update after installing
-
-
Open plugin settings
-
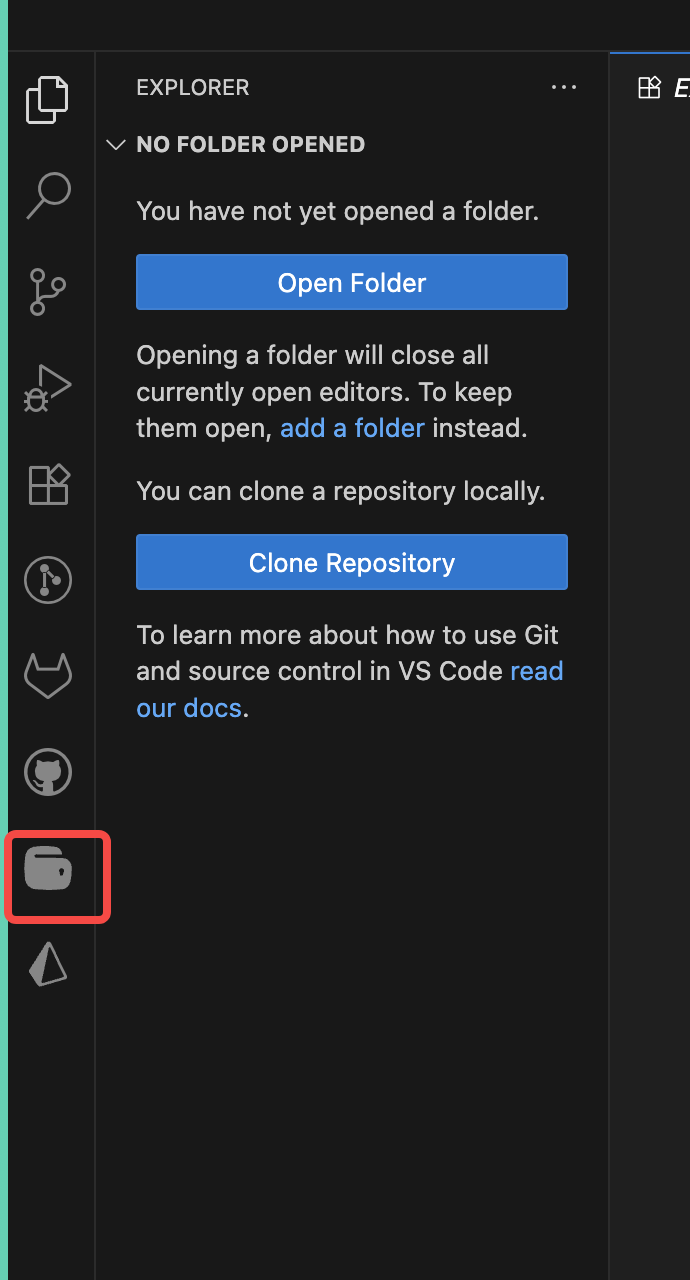
Once installed, click the plugin’s sidebar icon (it appears under the VS Code icon bar).
-
In the Gopay Miniapp Develop Tool panel, select Extension Settings

-
-
Configure required settings
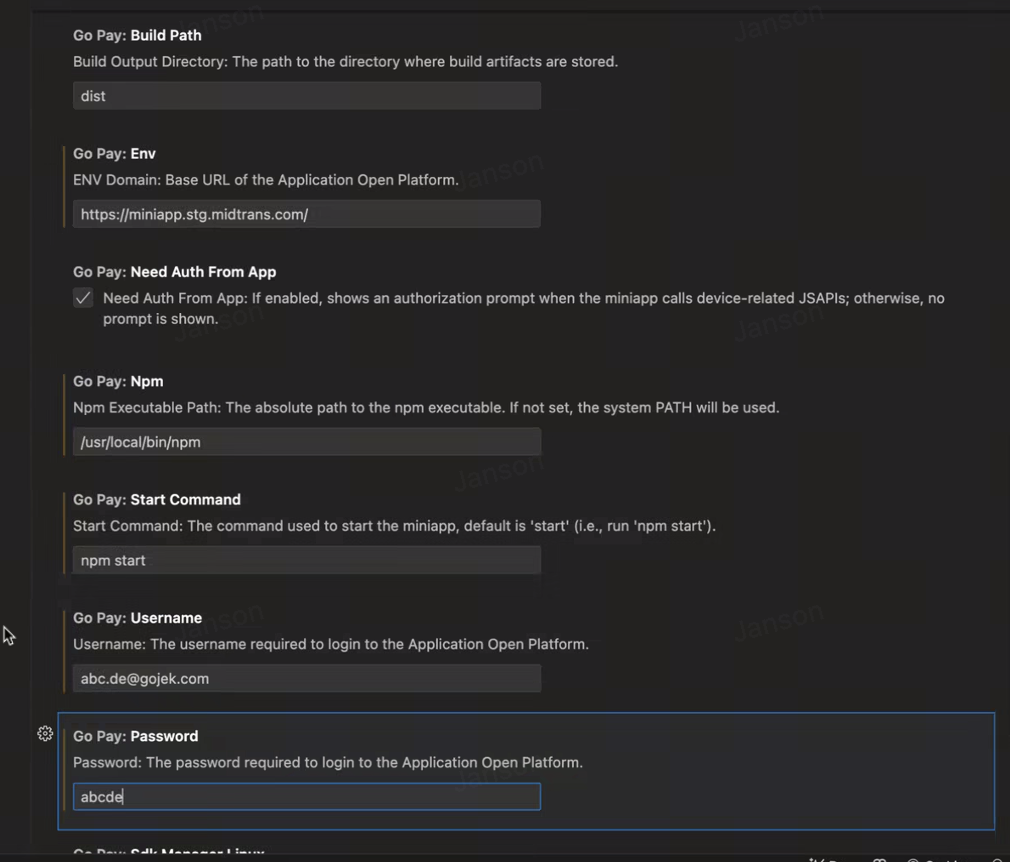
Fill in these parameters in the settings:-
Make sure you change these information as follows and restart the VSCode
- Go Pay: Env to [https://miniapp.midtrans.com]
- Go Pay: Username to [Portal username]
- Go Pay: Password to [Portal password]
- Restart VSCode to apply the changes
-
| Parameter | Description | Mandatory |
|---|---|---|
| Build Path | The directory where the build artifact is stored. Default value: dist. | M |
| Env | The development environment = https://miniapp.midtrans.com | M |
| Need Auth From App | If enabled, invoking client capabilities within the mini-program will prompt for authorization; otherwise, no authorization prompt will be shown. | O |
| Password | The account password used to log on to GoPay MiniApp Portal. | M |
| Username | The account username used to log on to GoPay MiniApp Portal. | M |
| Npm | The storage path of npm commands. | M |
| Start Command | The command for starting the miniapp. Default value: npm start. | M |
| Adb Linux | The storage path of Android adb commands in the macOS system. Default value: ~/Library/Android/sdk/platform-tools. | By Default |
| Adb Mac | The storage path of Android adb commands in the macOS system. Default value: ~/Library/Android/sdk/platform-tools. | By Default |
| Adb Windows | The storage path of Android adb commands in the Windows system. Example: D:\sdk\platform-tools. If your computer runs Windows, you must specify this parameter. If you do not specify this parameter, the Android emulator cannot start as expected. | By Default |
| Emulator Linux | The storage path of Android emulator commands in the Linux system. Default value: ~/Library/Android/sdk/emulator. | By Default |
| Emulator Mac | The storage path of Android emulator commands in the macOS system. Default value: ~/Library/Android/sdk/emulator. | By Default |
| Emulator Windows | The storage path of Android emulator commands in the Windows system. Example: D:\sdk\emulator. If your computer runs Windows, you must specify this parameter. If you do not specify this parameter, the Android emulator cannot start as expected. | By Default |
| Sdk Manager Linux | The storage path of Android sdkmanager commands in the Linux system. Default value: ~/Library/Android/sdk/tools/bin. | By Default |
| Sdk Manager Mac | The storage path of Android sdkmanager commands in the macOS system. Default value: ~/Library/Android/sdk/tools/bin. | By Default |
| Sdk Manager Windows | The storage path of Android sdkmanager commands in the Windows system. Example: D:\sdk\tools\bin. If your computer runs Windows, you must specify this parameter. If you do not specify this parameter, the Android emulator cannot start as expected. | By Default |
| Avd Manager Linux | The storage path of Android avdmanager commands in the Linux system. Default value: ~/Library/Android/sdk/tools/bin. | By Default |
| Avd Manager Mac | The storage path of Android avdmanager commands in the macOS system. Default value: ~/Library/Android/sdk/tools/bin. | By Default |
| Avd Manager Windows | The storage path of Android sdkmanager commands in the Windows system. Example: D:\sdk\tools\bin. If your computer runs Windows, you must specify this parameter. If you do not specify this parameter, an Android emulator cannot be created. | By Default |
Create project scaffold for MiniApp
-
Prepare your environment
- Ensure Visual Studio Code and Node.js (latest) are installed.
-
Initialize the scaffolding
-
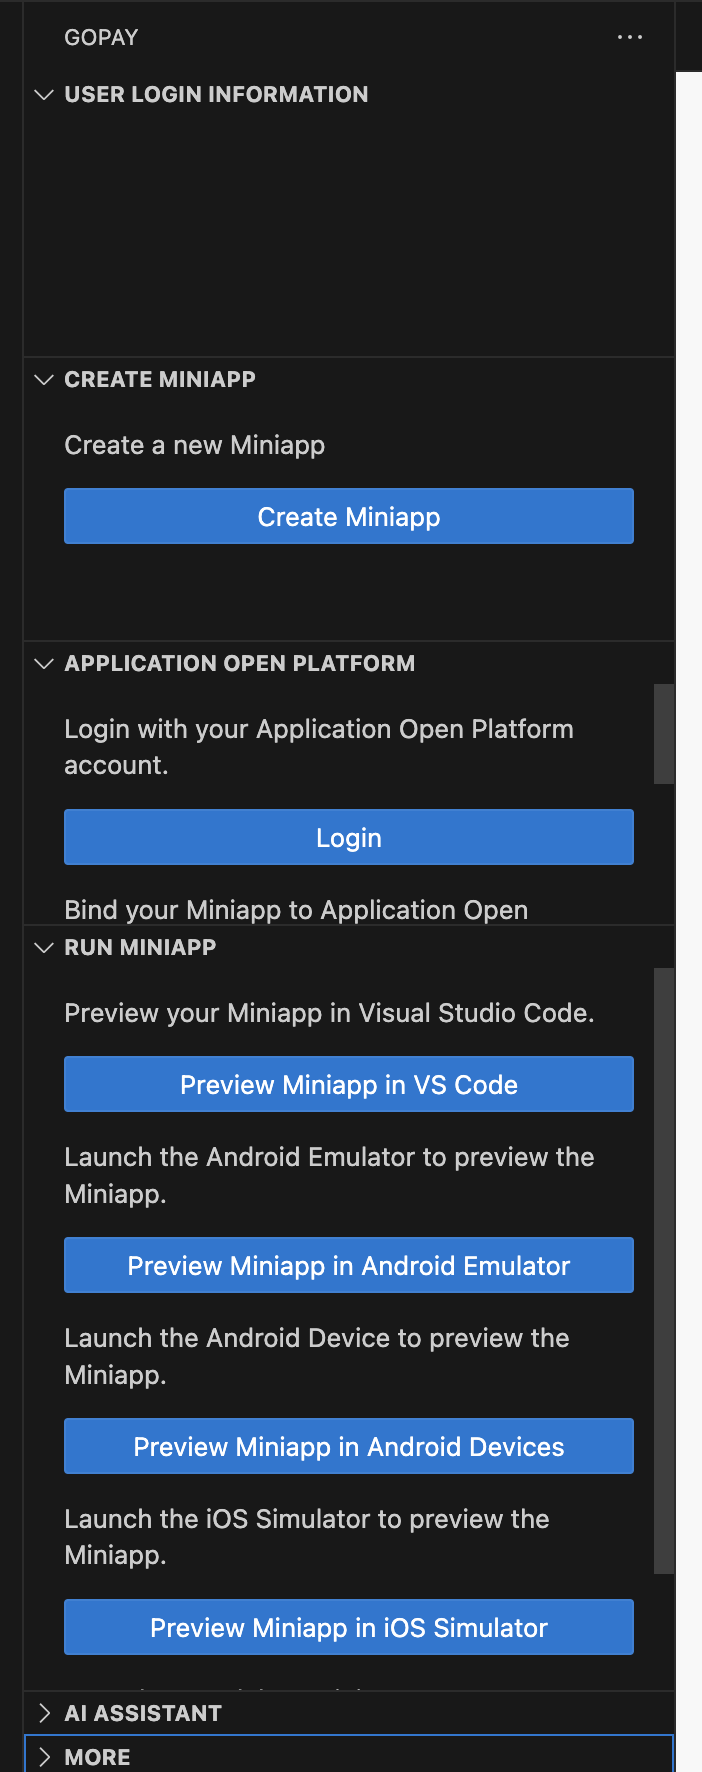
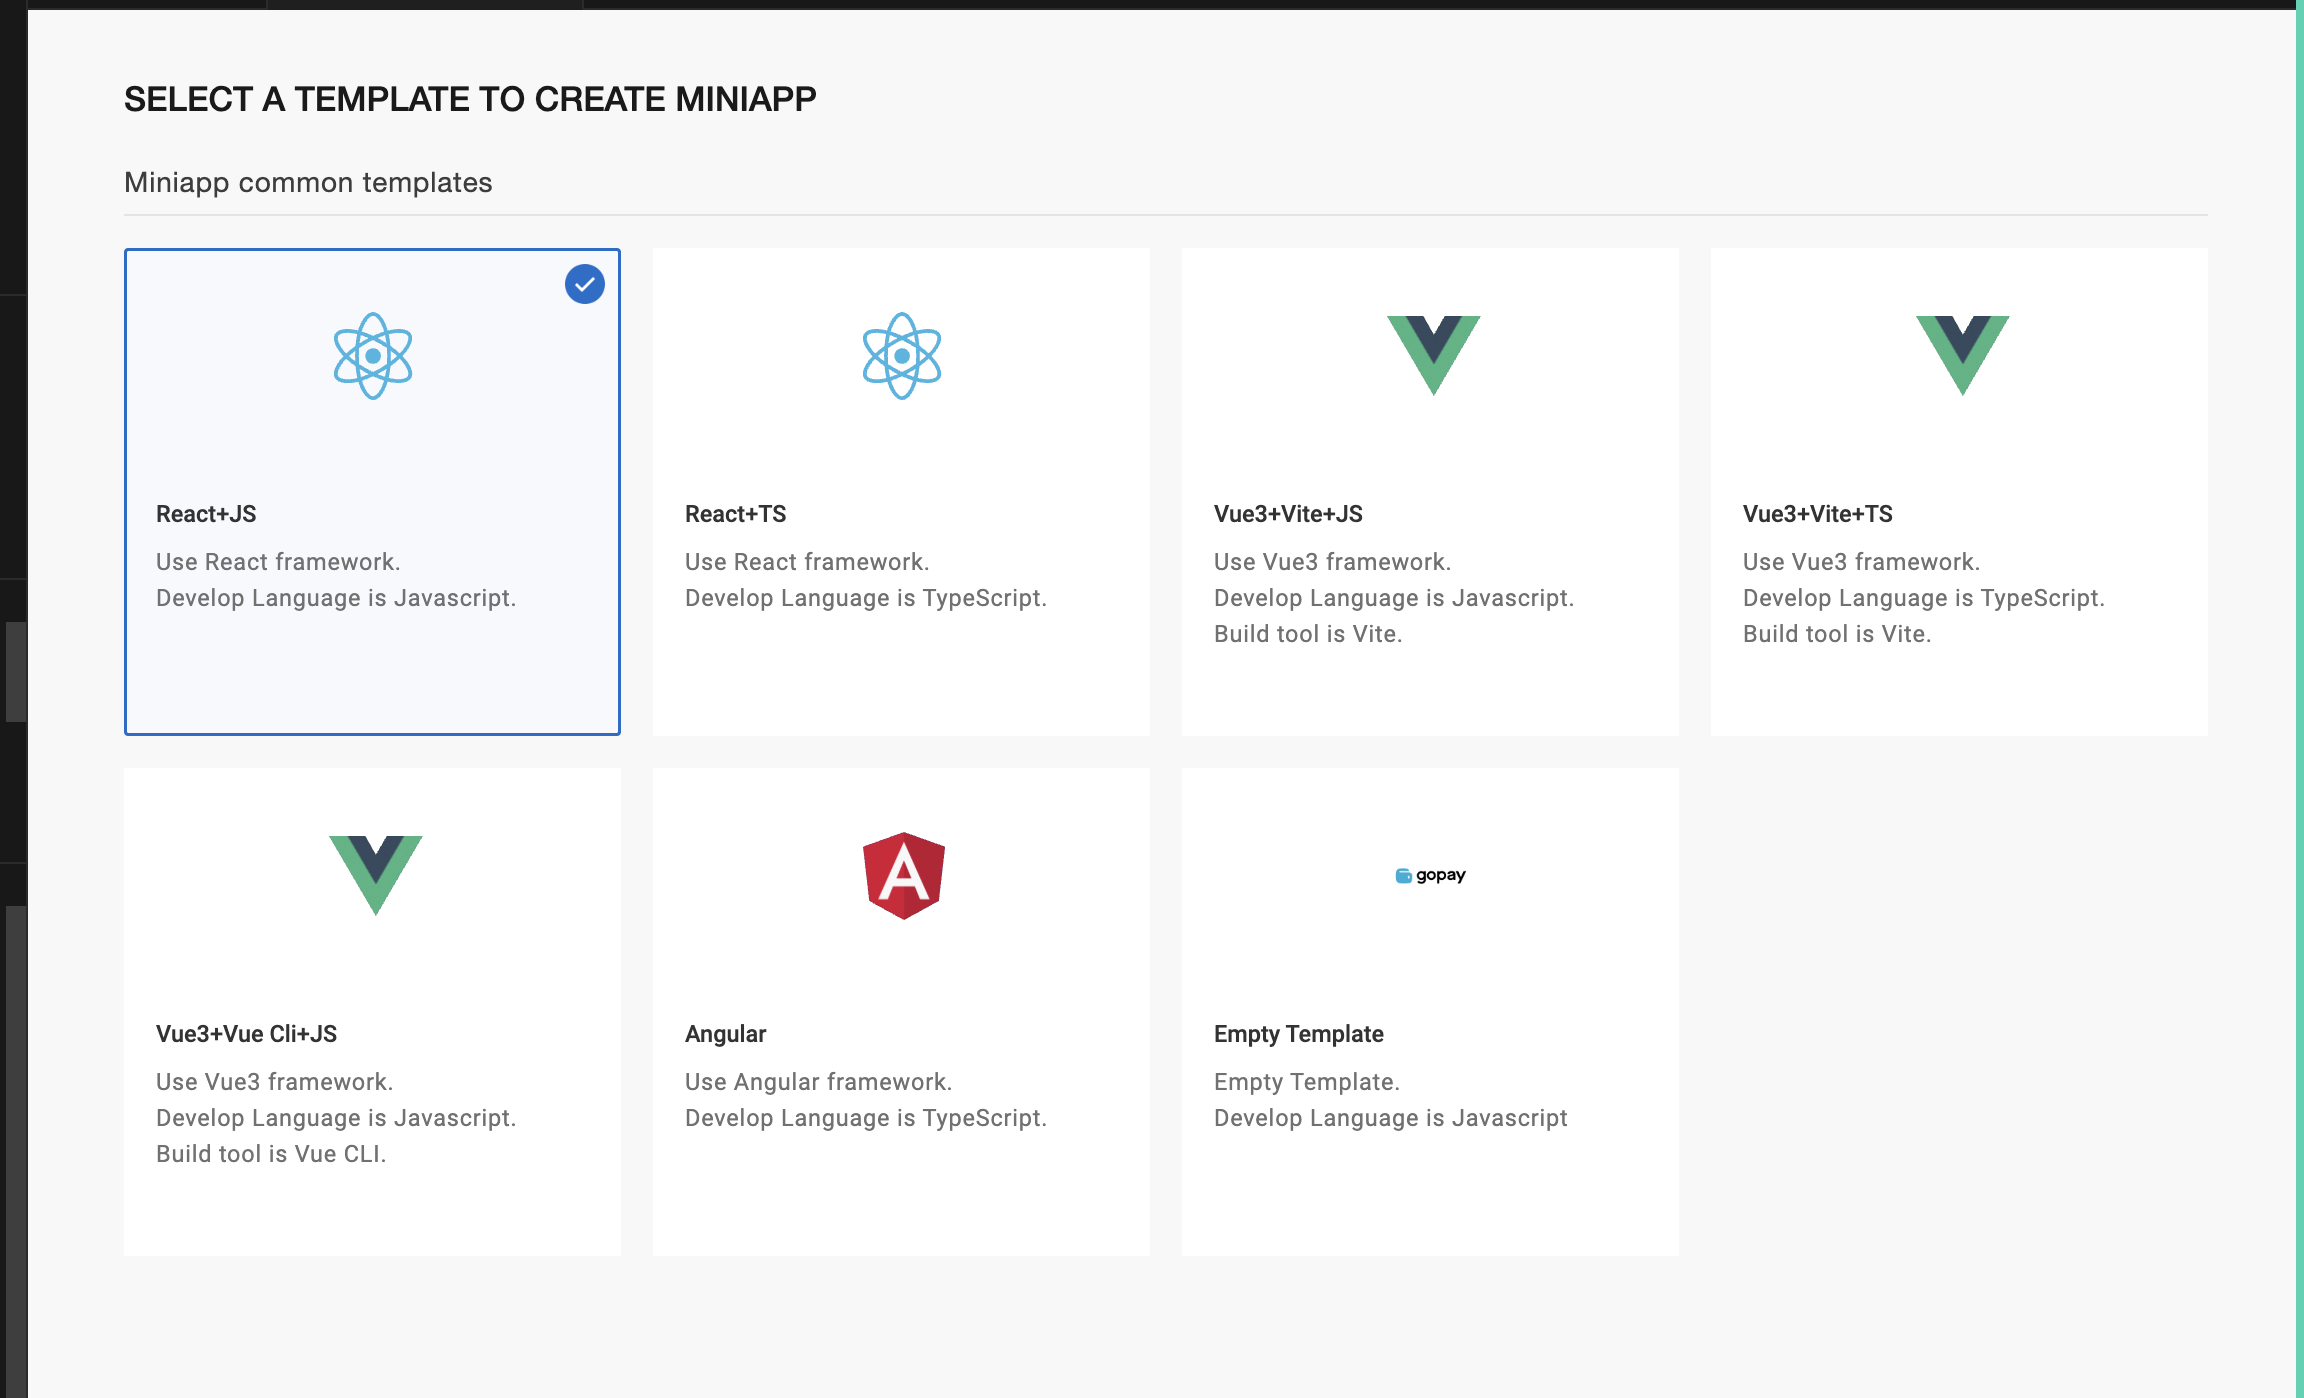
In VS Code, click the GoPay icon in the sidebar and choose Create Miniapp.
-
Pick a template (React, Vue, Angular, or plain JS).
-
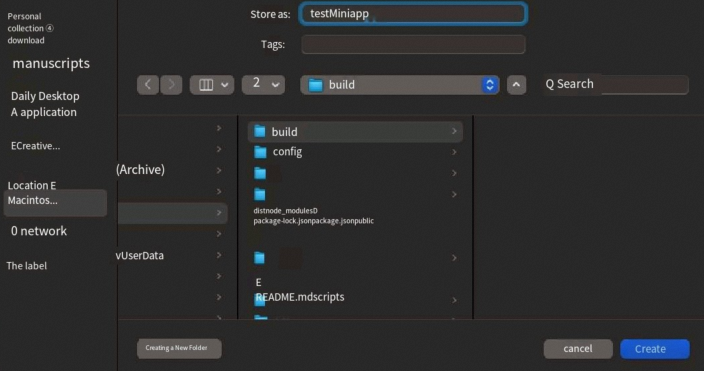
In the dialog, name your miniapp and select the project folder, then click Create. This opens the new project in VS Code automatically
-
-
Install dependencies
-
Open the integrated terminal and run:
npm install -
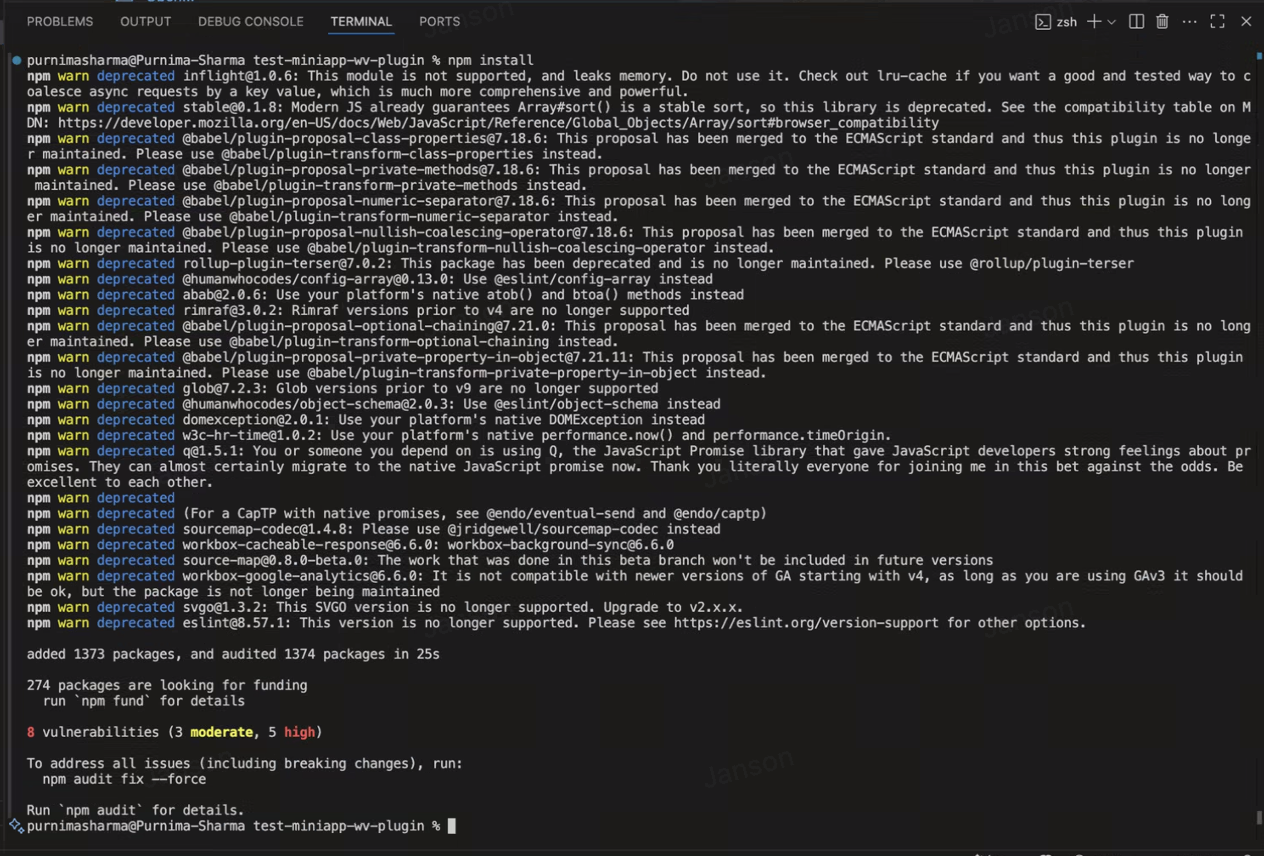
Your project file
-
-
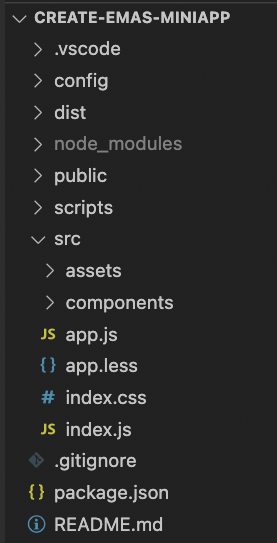
Explore project structure
Afternpm install, your project will include:- public/ – static assets
- scripts/ – build scripts
- src/ – source code (assets/, components/, index.js)
- package.json – project metadata & scripts
- node_modules/ – installed dependencies
- dist/ – build output (after packaging)
-
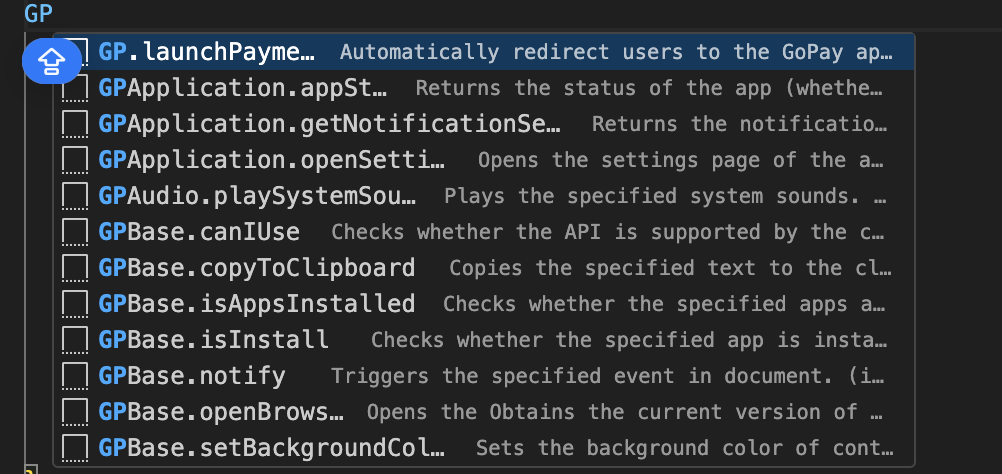
Integrate JavaScript APIs
-
In .js or .ts files, type GP to trigger IntelliSense suggestions for GoPay Container SDK JS APIs(available on Visual Studio Code).
-
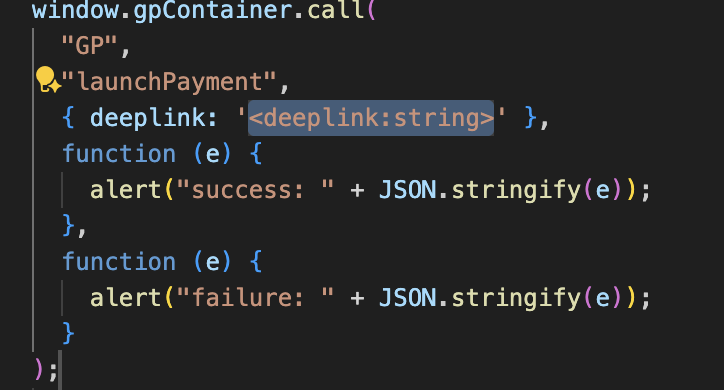
Select an API snippet to auto-insert usage code.
-